Quantcast
Channel: Android point
Viewing all 106 articles
Browse latest View live

Mostly Used Android Code

$
0
0
Hi Guys!

Today I share the code that are mostly used in the android. I collected the all the small part of the code that are used most of the cases. I hope you also enjoyed with this.

1. How to Disable Home Button


@Override
public void onAttachedToWindow()
{
this.getWindow().setType(WindowManager.
LayoutParams.TYPE_KEYGUARD_DIALOG);
super.onAttachedToWindow();
}

2. How to Disable Back Button


@Override
public boolean onKeyDown(int keyCode, KeyEvent event) {
return false;
}

3. How to Disable Soft Keypad


final EditText txtName = (EditText) findViewById(R.id.txtName);
txtName.setInputType(InputType.TYPE_NULL);


4. How to Make Static Rotation/orientation in Android


//if you want to lock screen for always Portrait mode
setRequestedOrientation(ActivityInfo.SCREEN_ORIENTATION_PORTRAIT);
or
//if you want to lock screen for always Landscape mode
setRequestedOrientation(ActivityInfo.SCREEN_ORIENTATION_LANDSCAPE);

5. How to Disable screen Rotation/orientation in Android (better way is java code)


//put this code in Manifest file, activity tag
android:screenOrientation="nosensor"
android:configChanges="keyboardHidden|orientation|screenSize"

/* or even you can do it by programmatically -- just put
Configuration code in onResume method before calling super
like this */
@Override
protected void onResume() {
int currentOrientation = getResources().getConfiguration()
.orientation;
if (currentOrientation == Configuration.ORIENTATION_LANDSCAPE)
{
setRequestedOrientation(ActivityInfo
.SCREEN_ORIENTATION_SENSOR_LANDSCAPE);
}
else {
setRequestedOrientation(ActivityInfo
.SCREEN_ORIENTATION_SENSOR_PORTRAIT);
}
super.onResume();
}


6. How to Disable Title Bar and Make Full Screen View


//1. put this line to manifest file in Application tag
android:theme="@android:style/Theme.Black.NoTitleBar.Fullscreen"

//2. put below code in your activity onCreate method

//to disable notification bar (Top Bar)
requestWindowFeature(Window.FEATURE_NO_TITLE);


//to set full screen view
getWindow().setFlags(WindowManager.LayoutParams.FLAG_FULLSCREEN,
WindowManager.LayoutParams.FLAG_FULLSCREEN);

//make sure code should be before calling below method
setContentView(R.layout.main);

7. How to Create Alert Dialog Box in Android


AlertDialog.Builder builder = new AlertDialog.Builder(this);
builder.setMessage("App has been started..")
.setCancelable(false)
.setTitle("Alert Box")
.setNegativeButton("OK", new DialogInterface.OnClickListener() {
public void onClick(DialogInterface dialog, int id) {
dialog.cancel();
}
});
AlertDialog alert = builder.create();
alert.show();


8. How to Create Toast message in Android


Toast.makeText(getApplicationContext(), "I am splash message..",
Toast.LENGTH_LONG).show();

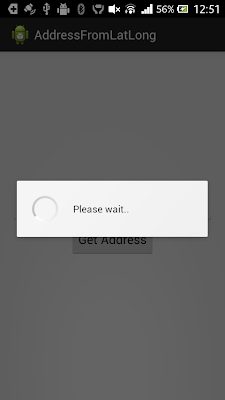
9. How to create Progress Dialog in Android


ProgressDialog dialog = ProgressDialog.show(this, "", "Loading. Please wait...", true);

10. Load Home Screen Programmatically in Android


Intent startMain = new Intent(Intent.ACTION_MAIN);
startMain.addCategory(Intent.CATEGORY_HOME);
startMain.setFlags(Intent.FLAG_ACTIVITY_NEW_TASK);
startActivity(startMain)

11. Start/Load Activity from Activity


//put this code where you want to load another Activity
Intent intent = new Intent(FirstActivty.this, SecondActivity.class);

//below 2 lines (Flags) are optional
// 1. if set, it will clear the back stack
intent.setFlags(Intent.FLAG_ACTIVITY_CLEAR_TOP);

// 2. If set, this activity will become the start of a new task
intent.addFlags(Intent.FLAG_ACTIVITY_NEW_TASK);

startActivity(intent);

12. Make a Phone Call


String mobileNo = "+9189000000";
String uri = "tel:" + mobileNo.trim() ;
Intent intent = new Intent(Intent.ACTION_CALL);
intent.setData(Uri.parse(uri));
startActivity(intent);

//add permission to Manifest file


13. How to check WiFi is Connected or Not


public void chekcWifiConnectDisconnect() {
ConnectivityManager connManager = (ConnectivityManager)
getSystemService(CONNECTIVITY_SERVICE);
NetworkInfo mWifi = connManager.getNetworkInfo(ConnectivityManager.TYPE_WIFI);

if (mWifi.isConnected()) {
Log.v("Debug", "Wifi is connectd..");
} else {
Log.v("Debug", "Wifi is not connectd..");
}

}

//dont forget to put Wifi permission in manifest file


What is Fragment ? And Start With HelloFragment

$
0
0
Hi guys!!

Today I am going to discuss about Fragment. Now it is available with new API open source library android-support v4 or v7 or v13.  android-support v13 is the recent api library.
So lets start to know about fragment the question is arises firstwhat is Fragment?

What is Fragment in Android?

  • A fragment is a class implementing a portion of an activity.
  • A fragment represents a particular operation or interface running within a larger activity.
  • Fragments must be embedded in activities; they cannot run independent of activities.
  • Most fragments define their own layout of views that live within the activity’s view hierarchy.  
  • A fragment has its own life-cycle, closely related to the life-cycle of its host activity. 
  • A fragment can be a static part of an activity, instantiated automatically during the activity’s creation.
  • Or, you can create, add, and remove fragments dynamically in an activity at run-time.

What is Life cycle of Fragment ?

Fragments have a few extra life cycle callbacks managing interaction with the activity:
onAttach(Activity) => Called when the fragment has been associated with the activity.
onCreateView(LayoutInflater, ViewGroup, Bundle)=> Called to create the view hierarchy associated   
 with the fragment.
onActivityCreated(Bundle) => Called when the activity’s onCreate() method has returned.
onDestroyView() => Called when the view hierarchy associated with the fragment is being removed.
onDetach() => Called when the fragment is being disassociated from the activity.


  Fragment Implemented ?

Fragments were added to the Android API in Honeycomb, API 11.
The primary classes related to fragments are:
android.app.Fragment 
android.app.FragmentManager 
android.app.FragmentTransaction
 
The primary classes related to fragments are available in library package are:
android.support.v4.app.FragmentActivity
android.support.v4.app.Fragment
android.support.v4.app.FragmentManager
android.support.v4.app.FragmentTransaction
 
To use the Compatibility Package features, your activity must use android.support.v4.app. FragmentActivity as a base class, rather than android.app.Activity or one of its subclasses. 
 
Lets start the use of this fragment with Simple Hello Fragment. 

main.xml


hello_fragment.xml


HelloFragment

package com.sunil.fragment;

import com.sunil.fragment.R;
import android.os.Bundle;
import android.support.v4.app.Fragment;
import android.view.LayoutInflater;
import android.view.View;
import android.view.ViewGroup;

public class HelloFragment extends Fragment{

@Override
public View onCreateView(LayoutInflater inflater, ViewGroup container, Bundle savedInstanceState) {
View v = inflater.inflate(R.layout.hello_fragment_layout, null);
return v;
}

}

MainActivity.java

package com.sunil.fragment;

import com.sunil.fragment.R;
import android.os.Bundle;
import android.support.v4.app.FragmentActivity;

public class MainActivity extends FragmentActivity {

@Override
public void onCreate(Bundle savedInstanceState) {
super.onCreate(savedInstanceState);
setContentView(R.layout.main);
}
}

Cheers Guys!!

Please share this site guys!
KidsMitra

ListFragment with Support Library

$
0
0
Hi Guys!

Today I am going to share the code the ListFragment. ListFragment  class is available inside the the android support v4 library.
Fragment is a new concept which is introduced in Android 3.0 and its higher versions.
A fragment that displays a list of items by binding to a data source such as an array or Cursor, and exposes event handlers when the user selects an item. 
ListFragment hosts a List View object that can be bound to different data sources, typically either an array or a Cursor holding query results.
For mode details, you can visit the android developer site for ListFragment.


activity_main.xml


FriendsList.java

package com.sunil.fragmentlistview;

import android.os.Bundle;
import android.support.v4.app.ListFragment;
import android.view.LayoutInflater;
import android.view.View;
import android.view.ViewGroup;
import android.widget.AdapterView;
import android.widget.AdapterView.OnItemClickListener;
import android.widget.ArrayAdapter;
import android.widget.Toast;

public class FriendsList extends ListFragment implements OnItemClickListener{

String[] myFrriends = new String[] {
"Sunil Gupta",
"Abhishek Tripathi",
"Awadhesh Diwakar",
"Amit Verma",
"Jitendra Singh",
"Ravi Jhansi",
"Ashish Jain",
"Sandeep Pal",
"Shishir Verma",
"Ravi BBD"
};

@Override
public View onCreateView(LayoutInflater inflater, ViewGroup container,
Bundle savedInstanceState) {
ArrayAdapter adapter= new ArrayAdapter(inflater.getContext(), android.R.layout.simple_list_item_1, myFrriends);
setListAdapter(adapter);
return super.onCreateView(inflater, container, savedInstanceState);
}
// this code for item click of the list

@Override
public void onActivityCreated(Bundle savedInstanceState) {
super.onActivityCreated(savedInstanceState);

getListView().setOnItemClickListener(this);
}

@Override
public void onItemClick(AdapterView adapter, View view, int position, long id) {

Toast.makeText(getActivity().getBaseContext(), "Item clicked: " + myFrriends[position], Toast.LENGTH_LONG).show();

}
}

MainActivity.java

package com.sunil.fragmentlistview;

import com.sunil.fragmentlistview.R;

import android.os.Bundle;
import android.support.v4.app.FragmentActivity;

public class MainActivity extends FragmentActivity {

@Override
protected void onCreate(Bundle arg0) {
super.onCreate(arg0);
setContentView(R.layout.activity_main);
}
}

Fragment List With Image and text with Detail

$
0
0
Hi Guys!

Today I am sharing the important code of fragment list view with image and text. I am using android support library  for this fragment.
A Fragment represents a behavior or a portion of user interface in an Activity. More detail about the fragment visit the android developer site here

Why would we use a fragment?

You can create all your logic in an Activity and then manipulate the screen based on device size and orientation but the amount of code to pro grammatically draw views and implement all the logic based on layout and/or orientation will be make the whole project more complex than it needs to be. This is where fragments come to rescue, you can separate out the logic based on a functional entity rather than how the whole application looks to the end user.

Fragment is available in android support library for more detail visit the android developer site here

Here we are using the cursor adapter for showing the item in list view with help of fragment by using the functionality onCreateView(). So lets start the coding the fragment that managed the portrait and landscape mode. And in details page we can use the the view pager that makes to swipe the item details from left to right. For more details about the View Pager please visit the android developer site here
I am not add to all code but added some code that are important to show this structure. 

 
Please watch the video.
 Screen shot in landscape mode:


layout/activity_main.xml


layout-land/activity_main.xml


fragment_list_selector


fragment_listview.xml


fragment_image_pager.xml


list_row_item.xml


>


CustomArrayAdapter.java

package com.example.fragmentactionbar;


import java.util.ArrayList;


import android.content.Context;
import android.content.res.Resources;
import android.graphics.Bitmap;
import android.util.Log;
import android.view.LayoutInflater;
import android.view.View;
import android.view.ViewGroup;
import android.widget.ArrayAdapter;
import android.widget.ImageView;
import android.widget.TextView;

public class CustomArrayAdapter extends ArrayAdapter{

private static final String TAG="CustomArrayAdapter";
private final int mLayoutResourceId;
private DataItem[] dataitem1=null;


public CustomArrayAdapter(Context context, int textViewResourceId, DataItem[] dataitem) {
super(context, textViewResourceId, dataitem);
Log.v(TAG, "CustomArrayAdapter call");
mLayoutResourceId = textViewResourceId;
dataitem1=dataitem;
}

@Override
public int getCount() {
Log.v(TAG, "Size of the list is:" +dataitem1.length);
return dataitem1.length;
}

@Override
public long getItemId(int position) {
return super.getItemId(position);
}
@Override
public View getView(int position, View convertView, ViewGroup parent) {

final ItemViewHolder holder;
if (convertView == null) {
LayoutInflater inflater = LayoutInflater.from(getContext());
convertView = inflater.inflate(mLayoutResourceId, null);

holder = new ItemViewHolder();
holder.imageView = (ImageView) convertView.findViewById(R.id.list_row_image_imageview);
holder.nameText = (TextView) convertView.findViewById(R.id.textView_friendname);
holder.nikeNameText = (TextView) convertView.findViewById(R.id.textview_friendnickname);
convertView.setTag(holder);
}
else {
holder = (ItemViewHolder) convertView.getTag();
}

DataItem item=getItem(position);
String name = item.getName();
int imageResId = item.getImageResId();
String nikename =item.getNickname();

Log.v(TAG, "name is: "+name);
Log.v(TAG, "nick name is: "+ nikename);


// Get a smaller version of the image to display in the list for less memory usage
Resources res = getContext().getResources();
int dimensInPixels = res.getDimensionPixelSize(R.dimen.list_row_image_item_dimensions);
Bitmap sampledBitmap = ImageUtils.decodeSampledBitmapFromResource(getContext().getResources(),
imageResId, dimensInPixels, dimensInPixels);

// Update the views
holder.nameText.setText(name);
holder.imageView.setImageBitmap(sampledBitmap);
holder.nikeNameText.setText("Nick Name: "+nikename);

return convertView;
}

private class ItemViewHolder {
public ImageView imageView;
public TextView nameText;
public TextView nikeNameText;
}


}

ItemListFragment.java

package com.example.fragmentactionbar;


import java.util.ArrayList;


import android.app.Activity;
import android.os.Bundle;
import android.support.v4.app.Fragment;
import android.util.Log;
import android.view.LayoutInflater;
import android.view.View;
import android.view.ViewGroup;
import android.widget.AbsListView;
import android.widget.AdapterView;
import android.widget.AdapterView.OnItemClickListener;
import android.widget.ListView;

public class ItemListFragment extends Fragment implements OnItemClickListener, ImageSelector{

private static final String TAG="ItemListFragment";
private ListView mListView;
private CustomArrayAdapter cursorArrayAdapter;
private OnItemSelectedListener mParentOnItemSelectedListener;
private Boolean status;


@Override
public void onCreate(Bundle savedInstanceState) {
super.onCreate(savedInstanceState);
Log.v(TAG, "onCreate: savedInstanceState " + (savedInstanceState == null ? "ture" : "false") + " null");

if (savedInstanceState != null) {
status = false;
}
else {
status = true;
}
}

@Override
public void onAttach(Activity activity) {
super.onAttach(activity);
Log.v(TAG+"onAttach", "onAttach call");

Fragment parentFragment = getParentFragment();
if (parentFragment != null && parentFragment instanceof OnItemSelectedListener) {
mParentOnItemSelectedListener = (OnItemSelectedListener) parentFragment;
}

else if (activity != null && activity instanceof OnItemSelectedListener) {
mParentOnItemSelectedListener = (OnItemSelectedListener) activity;
}

else if (mParentOnItemSelectedListener == null) {
Log.w(TAG, "onAttach: niether the parent fragment or parent activity implement OnImageSelectedListener, "
+ "image selections will not be communicated to other components");
}

}

@Override
public View onCreateView(LayoutInflater inflater, ViewGroup container,
Bundle savedInstanceState) {
Log.v(TAG, "onCreateView: savedInstanceState " + (savedInstanceState == null ? "true" : "false") + " null");
View v = inflater.inflate(R.layout.farfment_listview, container, false);

mListView = (ListView) v.findViewById(R.id.fragment_image_list_listview);
mListView.setOnItemClickListener(this);
cursorArrayAdapter=new CustomArrayAdapter(getActivity(), R.layout.list_row_item, StaticItemData.getImageItemArrayInstance());
mListView.setAdapter(cursorArrayAdapter);
mListView.setChoiceMode(AbsListView.CHOICE_MODE_SINGLE);

// If first creation of fragment, select the first item
if (status && cursorArrayAdapter.getCount() > 0) {

// Default the selection to the first item
mListView.setItemChecked(0, true);
}

// initial onCreate
if (status) {
status = false;
}

return v;
}

@Override
public void onItemClick(AdapterView arg0, View arg1, int position, long id) {
Log.d(TAG, "onItemClick: " + "pos: " + position + " id: " + id);

// Highlight the selected row
mListView.setItemChecked(position, true);
if (mParentOnItemSelectedListener != null) {
DataItem dataItem= cursorArrayAdapter.getItem(position);
mParentOnItemSelectedListener.onItemSelected(dataItem, position);
}
}

@Override
public void setImageSelected(DataItem dataItem, int position) {

if (isResumed()) {
// If the selected position is valid, and different than what is
// currently selected, highlight that row in the list and
// scroll to it
if (position >= 0 && position < cursorArrayAdapter.getCount()
&& position != mListView.getCheckedItemPosition()) {
Log.d(TAG, "setImageSelected: title = " + dataItem.getName() + " position = " + position);

// Highlight the selected row and scroll to it
mListView.setItemChecked(position, true);
mListView.smoothScrollToPosition(position);
}
}
}


}

ItemPagerFragment.java

package com.example.fragmentactionbar;

import android.app.Activity;
import android.os.Bundle;
import android.support.v4.app.Fragment;
import android.support.v4.view.ViewPager;
import android.support.v4.view.ViewPager.OnPageChangeListener;
import android.util.Log;
import android.view.LayoutInflater;
import android.view.View;
import android.view.ViewGroup;

public class ItemPagerFragment extends Fragment implements OnPageChangeListener, ImageSelector{

private static final String TAG="ItemPagerFragment";
private ViewPager mViewPager;
private ItemPagerAdapter mImagePagerAdapter;
private OnItemSelectedListener mParentOnImageSelectedListener;
private DataItem[] mPagerImageItems;


@Override
public void onAttach(Activity activity) {
super.onAttach(activity);
Log.v(TAG, "onAttach");

// Check if parent fragment (if there is one) implements the image
// selection interface
Fragment parentFragment = getParentFragment();
if (parentFragment != null && parentFragment instanceof OnItemSelectedListener) {
mParentOnImageSelectedListener = (OnItemSelectedListener) parentFragment;
}
// Otherwise, check if parent activity implements the image
// selection interface
else if (activity != null && activity instanceof OnItemSelectedListener) {
mParentOnImageSelectedListener = (OnItemSelectedListener) activity;
}
// If neither implements the image selection callback, warn that
// selections are being missed
else if (mParentOnImageSelectedListener == null) {
Log.w(TAG, "getting null");
}
}

@Override
public void onCreate(Bundle savedInstanceState) {
super.onCreate(savedInstanceState);
Log.v(TAG, "onCreate: savedInstanceState " + (savedInstanceState == null ? "==" : "!=") + " null");
}

@Override
public View onCreateView(LayoutInflater inflater, ViewGroup container, Bundle savedInstanceState) {
Log.v(TAG, "onCreateView: savedInstanceState " + (savedInstanceState == null ? "==" : "!=") + " null");

// Inflate the fragment main view in the container provided
View v = inflater.inflate(R.layout.fragment_image_pager, container, false);

// Setup views
mViewPager = (ViewPager) v.findViewById(R.id.fragment_image_pager_viewpager);
mPagerImageItems = StaticItemData.getImageItemArrayInstance();
mImagePagerAdapter = new ItemPagerAdapter(mPagerImageItems);
mViewPager.setAdapter(mImagePagerAdapter);

// Listen for page changes to update other views
mViewPager.setOnPageChangeListener(this);

return v;
}


@Override
public void onViewCreated(View view, Bundle savedInstanceState) {
super.onViewCreated(view, savedInstanceState);
Log.v(TAG, "onViewCreated");
}

@Override
public void onActivityCreated(Bundle savedInstanceState) {
super.onActivityCreated(savedInstanceState);
Log.v(TAG, "onActivityCreated");
}

@Override
public void onViewStateRestored(Bundle savedInstanceState) {
super.onViewStateRestored(savedInstanceState);
Log.v(TAG, "onViewStateRestored");
}


@Override
public void onPageScrollStateChanged(int state) {
}

@Override
public void onPageScrolled(int position, float positionOffset, int positionOffsetPixels) {
}

@Override
public void onPageSelected(int position) {
Log.d(TAG, "onPageSelected: " + position);

// Inform our parent listener that an image was selected
if (mParentOnImageSelectedListener != null) {
mParentOnImageSelectedListener.onItemSelected(mPagerImageItems[position], position);
}
}


@Override
public void setImageSelected(DataItem dataitem, int position) {
if (isResumed()) {
// If the selected position is valid, and different than what is
// currently selected, move the pager to that image
if (position >= 0 && position < mImagePagerAdapter.getCount()
&& position != mViewPager.getCurrentItem()) {
Log.d(TAG, "setImageSelected: title = " + dataitem.getName() + " position = " + position);

// Move the view pager to the current image
mViewPager.setCurrentItem(position, true);
}
}
}

}

MainActivity.java

package com.example.fragmentactionbar;


import android.os.Bundle;
import android.support.v4.app.FragmentActivity;
import android.support.v4.app.FragmentTransaction;
import android.util.Log;
import android.view.ViewGroup;


public class MainActivity extends FragmentActivity {

private static final String TAG="MainActivity";
private ViewGroup framelayoutmain;
@Override
protected void onCreate(Bundle savedInstanceState) {
super.onCreate(savedInstanceState);

Log.v(TAG, "onCreate: savedInstanceState " + (savedInstanceState == null ? "true" : "false") + " null");
setContentView(R.layout.activity_main);


if (savedInstanceState != null) {

}
else {
framelayoutmain = (ViewGroup) findViewById(R.id.activity_main);
if (framelayoutmain != null) {
Log.i(TAG, "onCreate: adding framelayoutmain to MainActivity");

// Add image selector fragment to the activity's container layout
ItemSelectorFragment imageSelectorFragment = new ItemSelectorFragment();
FragmentTransaction fragmentTransaction = getSupportFragmentManager().beginTransaction();
fragmentTransaction.replace(framelayoutmain.getId(), imageSelectorFragment,ItemSelectorFragment.class.getName());

// Commit the transaction
fragmentTransaction.commit();
}

}
}

}
Screen shot in portrait mode:
Cheers Guys!!

Google Map Android API V2 with Location GeoCoding

$
0
0
Hi Guys,

Today I am sharing the code about Google Map Android V2 and get the location on map by Geo-coding.
In this new version of Google Map Android there are many things are changed now.

1. For using  this new feature you have installed the Google Play Service in your android SDK Manager. So need to installed. After installed this feature of sdk then automatically created the the google play service library project in your default folder (sdk\extras\google\google_play_services\libproject) .
Because we need to add this library project with our new android project with Google Map.
See the screen shot.

2. Now need to create the Google API key from Google API console. 
 Before create the new Google API key you need to switch on service of Google Map Android V2 from your Google Services. Please see the screen shot.


3. Now the next step need to create the SHA1 finger print by using the keytool and your project name.
So create the the Android name folder inside the C drive (C:\Android ) of your computer. And put the two file inside this folder. 1. debug.keystore 2. keytool.exe


4. In the next step you need to run the command on cmd to generate the SHA1 finger print key by using this keystore. So the command is :
keytool -list -v -keystore "C:\Android\debug.keystore" -alias androiddebugkey -storepass android -keypass android
After run this command on cmd it will create the SHA1 finger key.


5. In this step you just copy thus SHA1 key from cmd and paste on the Google console of configure android key for API project with your android project package name.

After that your API key will show on your Google console. Now you can use that API key in your project.

6. Now need to import the Google-play -service_lib project in your eclipse. This project is stored inside the (sdk\extras\google\google_play_services\libproject).

7. So here we start the create the new project name "GoogleMapLocationAPIV2" and set the target with Google API and add the Google play servicelibrary project with this project. See the screen shot.


  • Then right click of project  select , Click “Android Tools -> Add Support Library “. In the new API it is already available then no need to add. Add only in below API.

activity_main.xml


MainActivity.java

package com.sunil.apiv2map.activity;

import java.io.BufferedReader;
import java.io.IOException;
import java.io.InputStream;
import java.io.InputStreamReader;
import java.io.UnsupportedEncodingException;
import java.net.HttpURLConnection;
import java.net.URL;
import java.net.URLEncoder;
import java.util.HashMap;
import java.util.List;

import org.json.JSONObject;

import android.os.AsyncTask;
import android.os.Bundle;
import android.support.v4.app.FragmentActivity;
import android.util.Log;
import android.view.Menu;
import android.view.View;
import android.view.View.OnClickListener;
import android.widget.Button;
import android.widget.EditText;
import android.widget.Toast;

import com.google.android.gms.maps.CameraUpdateFactory;
import com.google.android.gms.maps.GoogleMap;
import com.google.android.gms.maps.SupportMapFragment;
import com.google.android.gms.maps.model.LatLng;
import com.google.android.gms.maps.model.MarkerOptions;
import com.sunil.apiv2map.R;

public class MainActivity extends FragmentActivity {

Button mBtnFind;
GoogleMap mMap;
EditText etPlace;

private static final String TAG="MainActivity";


@Override
protected void onCreate(Bundle savedInstanceState) {
super.onCreate(savedInstanceState);
setContentView(R.layout.activity_main);
Log.v(TAG+"onCreate", "onCreate call");
// Getting reference to the find button
mBtnFind = (Button) findViewById(R.id.btn_show);

// Getting reference to the SupportMapFragment
SupportMapFragment mapFragment = (SupportMapFragment)getSupportFragmentManager().findFragmentById(R.id.map);

// Getting reference to the Google Map
mMap = mapFragment.getMap();


//MapFragment mapfragment =(MapFragment) getFragmentManager().findFragmentById(R.id.map);
// mMap=mapfragment.getMap();
// Getting reference to EditText
etPlace = (EditText) findViewById(R.id.et_place);

// Setting click event listener for the find button
mBtnFind.setOnClickListener(new OnClickListener() {

@Override
public void onClick(View v) {
// Getting the place entered

Log.v(TAG+"onClick", "onClick call");
String location = etPlace.getText().toString();

if(location==null || location.equals("")){
Toast.makeText(getBaseContext(), "No Place is entered", Toast.LENGTH_SHORT).show();
return;
}

String url = "https://maps.googleapis.com/maps/api/geocode/json?";

try {
// encoding special characters like space in the user input place
location = URLEncoder.encode(location, "utf-8");
} catch (UnsupportedEncodingException e) {
e.printStackTrace();
}

String address = "address=" + location;

String sensor = "sensor=false";


// url , from where the geocoding data is fetched
url = url + address + "&" + sensor;
Log.v(TAG+"onClick", "url is: "+url);
// String modifiedURL= url.toString().replace(" ", "%20");

// Instantiating DownloadTask to get places from Google Geocoding service
// in a non-ui thread
DownloadTask downloadTask = new DownloadTask();

// Start downloading the geocoding places
downloadTask.execute(url);


}
});

}

private String downloadUrl(String strUrl) throws IOException{
String data = "";
InputStream iStream = null;
HttpURLConnection urlConnection = null;
try{
URL url = new URL(strUrl);


// Creating an http connection to communicate with url
urlConnection = (HttpURLConnection) url.openConnection();

// Connecting to url
urlConnection.connect();

// Reading data from url
iStream = urlConnection.getInputStream();

BufferedReader br = new BufferedReader(new InputStreamReader(iStream));

StringBuffer sb = new StringBuffer();

String line = "";
while( ( line = br.readLine()) != null){
sb.append(line);
}

data = sb.toString();

br.close();

}catch(Exception e){
Log.d("Exception while downloading url", e.toString());
}finally{
iStream.close();
urlConnection.disconnect();
}

return data;

}


/** A class, to download Places from Geocoding webservice */
private class DownloadTask extends AsyncTask{

String data = null;

// Invoked by execute() method of this object
@Override
protected String doInBackground(String... url) {
try{
data = downloadUrl(url[0]);
}catch(Exception e){
Log.d("Background Task",e.toString());
}
return data;
}

// Executed after the complete execution of doInBackground() method
@Override
protected void onPostExecute(String result){

ParserTask parserTask = new ParserTask();
parserTask.execute(result);
}

}


class ParserTask extends AsyncTask>>{

JSONObject jObject;


@Override
protected List> doInBackground(String... jsonData) {

List> places = null;
GeocodeJSONParser parser = new GeocodeJSONParser();

try{
jObject = new JSONObject(jsonData[0]);

/** Getting the parsed data as a an ArrayList */
places = parser.parse(jObject);

}catch(Exception e){
Log.d("Exception",e.toString());
}
return places;
}

// Executed after the complete execution of doInBackground() method
@Override
protected void onPostExecute(List> list){

// Clears all the existing markers
mMap.clear();

for(int i=0;i hmPlace = list.get(i);

double lat = Double.parseDouble(hmPlace.get("lat"));
double lng = Double.parseDouble(hmPlace.get("lng"));

String name = hmPlace.get("formatted_address");
LatLng latLng = new LatLng(lat, lng);
markerOptions.position(latLng);
markerOptions.title(name);

mMap.addMarker(markerOptions);

// Locate the first location
if(i==0)
mMap.animateCamera(CameraUpdateFactory.newLatLng(latLng));
}
}
}

}

GeocodeJSONParser.java

package com.sunil.apiv2map.activity;

import java.util.ArrayList;
import java.util.HashMap;
import java.util.List;

import org.json.JSONArray;
import org.json.JSONException;
import org.json.JSONObject;

public class GeocodeJSONParser {

public List> parse(JSONObject jObject){

JSONArray jPlaces = null;
try {
jPlaces = jObject.getJSONArray("results");
} catch (JSONException e) {
e.printStackTrace();
}

return getPlaces(jPlaces);
}


private List> getPlaces(JSONArray jPlaces){
int placesCount = jPlaces.length();
List> placesList = new ArrayList>();
HashMap place = null;

/** Taking each place, parses and adds to list object */
for(int i=0; i getPlace(JSONObject jPlace){

HashMap place = new HashMap();
String formatted_address = "-NA-";
String lat="";
String lng="";


try {
// Extracting formatted address, if available
if(!jPlace.isNull("formatted_address")){
formatted_address = jPlace.getString("formatted_address");
}

lat = jPlace.getJSONObject("geometry").getJSONObject("location").getString("lat");
lng = jPlace.getJSONObject("geometry").getJSONObject("location").getString("lng");


place.put("formatted_address", formatted_address);
place.put("lat", lat);
place.put("lng", lng);


} catch (JSONException e) {
e.printStackTrace();
}
return place;
}
}

Now to add the manifest file the API key and Permissions . Please see the screen shot.


After run the project Google Map is loaded and  find the location "btm layout Bangalore" screen looks like that:


And you can use the functionality of ZOOM when click on + button the location looks like that.


You can download the source code GoogleMapLocationAPIV2

Cheers Guys!!

Send Email Via Gmail with Java Mail API in Android

$
0
0
Hi Guys!

Today I am sharing the code to send the email via gmail to any gmail user without interfere of any application with help of java mail API.
The JavaMail API provides a platform-independent and protocol-independent framework to build mail and messaging applications.
In our application we are going to use following things from JavaMail API:
  • Multipart class: - it allow to device message into multipart so that long message can be sent easily.
  • Session: - in order to send mail we need to create session between hosts.
  • InternetAddress : it contains address , simply maid ID (example: abc@gmail.com).
For use of this you need to download the some jar file from Here.
1.  additional.jar
2. mail.jar
3. activation.jar

Download these jar file and make a java build path with your project.

Lets Start the coding to make a android project.

activity_main.xml


MainActivity.java

package com.sunil.sendmail;

import java.util.Properties;

import javax.mail.Message;
import javax.mail.MessagingException;
import javax.mail.PasswordAuthentication;
import javax.mail.Session;
import javax.mail.Transport;
import javax.mail.internet.InternetAddress;
import javax.mail.internet.MimeMessage;

import com.sunil.sendmail.R;

import android.app.Activity;
import android.app.ProgressDialog;
import android.content.Context;
import android.os.AsyncTask;
import android.os.Bundle;
import android.view.View;
import android.view.View.OnClickListener;
import android.widget.Button;
import android.widget.EditText;
import android.widget.Toast;

public class MainActivity extends Activity implements OnClickListener{

Session session=null;
ProgressDialog pdialog=null;
Context context=null;
EditText reciept=null;
EditText sub=null;
EditText msg=null;
String recpient=null;
String subject=null;
String textmessage=null;

@Override
protected void onCreate(Bundle savedInstanceState) {
// TODO Auto-generated method stub
super.onCreate(savedInstanceState);
setContentView(R.layout.activity_main);
context=this;
Button login = (Button) findViewById(R.id.mBtnSubmit);
reciept=(EditText)findViewById(R.id.editText_to);
sub = (EditText) findViewById(R.id.editText_sub);
msg = (EditText) findViewById(R.id.editText_text);


login.setOnClickListener(this);


}

@Override
public void onClick(View v) {

recpient= reciept.getText().toString();
subject= sub.getText().toString();
textmessage= msg.getText().toString();

Properties props = new Properties();
props.put("mail.smtp.host", "smtp.gmail.com");
props.put("mail.smtp.socketFactory.port", "465");
props.put("mail.smtp.socketFactory.class", "javax.net.ssl.SSLSocketFactory");
props.put("mail.smtp.auth", "true");
props.put("mail.smtp.port", "465");

session = Session.getDefaultInstance(props, new javax.mail.Authenticator() {
protected PasswordAuthentication getPasswordAuthentication() {
return new PasswordAuthentication("Your Gmail-ID", "Your Gmail_password");
}
});
pdialog = ProgressDialog.show(context, "", "Sending Mail...",true);
RetreiveFeedTask task= new RetreiveFeedTask();
task.execute();
}


class RetreiveFeedTask extends AsyncTask {


protected String doInBackground(String... urls) {
try {

Message message = new MimeMessage(session);
message.setFrom(new InternetAddress("
Your Gmail-ID"));
message.setRecipients(Message.RecipientType.TO, InternetAddress.parse(recpient));
message.setSubject(subject);
message.setContent(textmessage, "text/html; charset=utf-8");

Transport.send(message);


}
catch (MessagingException e) {
e.printStackTrace();
}
catch (Exception e) {
e.printStackTrace();

}
return null;
}

protected void onPostExecute(String feed) {
pdialog.dismiss();
reciept.setText("");
msg.setText("");
sub.setText("");
Toast.makeText(getApplicationContext(), "Message sent", Toast.LENGTH_LONG).show();

}
}


}

Add the INTERNET permission in the AndroidManifest file .
  <uses-permission android:name="android.permission.INTERNET"/>

You can download the source code Send Mail.

Cheers Guys!

Facebook Integration with Android App

$
0
0
Hi Guys!

Today I going to share about the Facebook Integration with Android App.
The Facebook SDK for Android is the easiest way to integrate your Android app with Facebook's platform. The SDK provides support for Login with Facebook authentication, reading and writing to Facebook APIs and support for UI elements such as pickers and dialogs.

What I am going to implement watch in video.


The First thing is Download and extract the SDK ZIP file. The resulting folder, facebook-android-sdk-3.0.2, contains the SDK itself. We need to add this sdk library with our new android app project.

Now the second thing is need to get the SHA1 (Hash Key). For this we need to download the openssl and install in our system and configure with the system environment variable. Here is the link to download the setup OpenSsl. 
And set the path like that C:\Program Files (x86)\GnuWin32\bin (this is default directory to install in your system).
In the next step we have to create a folder inside the C drive name "Android" and copy the debug.keystore (default directory in my system is "C:\Users\sunil\.android") and paste inside thie Android folder.

Now the time is to generate the sha1 key by using the keystore file so use this command
C:\>keytool -exportcert -alias androiddebugkey -keystore "C:\Android\debug.keystore" | openssl sha1 -binary | openssl base64


 Once run this command then it asking about password then give password "android". Then it will generate the app id.

Now need to use this app id with your Facebook account. So logged your Facebook Account and click on developer tab and click on Apps tab.

 
You need to registered as a developer and save your SHA1 key here.


In the next step we need to create the new app then go to dashboard Apps tab and create new app.

After that it show the app id and secret app id


So you can use this APP ID  in your android project.

Lets create the the android project name "First Android" and add the facebook sdk as a library.


Lets start the coding now.


activity_main.xml


MainActivity.java

package com.sunil;

import java.io.FileNotFoundException;
import java.io.IOException;
import java.net.MalformedURLException;

import org.json.JSONException;
import org.json.JSONObject;

import android.app.Activity;
import android.content.Intent;
import android.content.SharedPreferences;
import android.os.Bundle;
import android.util.Log;
import android.view.View;
import android.widget.Button;
import android.widget.TextView;
import android.widget.Toast;

import com.facebook.android.AsyncFacebookRunner;
import com.facebook.android.AsyncFacebookRunner.RequestListener;
import com.facebook.android.DialogError;
import com.facebook.android.Facebook;
import com.facebook.android.Facebook.DialogListener;
import com.facebook.android.FacebookError;

public class MainActivity extends Activity {

// Your Facebook APP ID
private static String APP_ID = "Your APP_ID"; // Replace with your App ID

// Instance of Facebook Class
private Facebook facebook = new Facebook(APP_ID);
private AsyncFacebookRunner mAsyncRunner;
String FILENAME = "AndroidSSO_data";
private SharedPreferences mPrefs;

// Buttons
Button btnFbLogin;
Button btnFbGetProfile;
Button btnPostToWall;
Button btnShowAccessTokens;

@SuppressWarnings("deprecation")
@Override
public void onCreate(Bundle savedInstanceState) {
super.onCreate(savedInstanceState);
setContentView(R.layout.activity_main);

btnFbLogin = (Button) findViewById(R.id.btn_fblogin);
btnFbGetProfile = (Button) findViewById(R.id.btn_get_profile);
btnPostToWall = (Button) findViewById(R.id.btn_fb_post_to_wall);
btnShowAccessTokens = (Button) findViewById(R.id.btn_show_access_tokens);
mAsyncRunner = new AsyncFacebookRunner(facebook);

/**
* Login button Click event
* */
btnFbLogin.setOnClickListener(new View.OnClickListener() {

@Override
public void onClick(View v) {
Log.d("Image Button", "button Clicked");
loginToFacebook();
}
});

/**
* Getting facebook Profile info
* */
btnFbGetProfile.setOnClickListener(new View.OnClickListener() {

@Override
public void onClick(View v) {
getProfileInformation();
}
});

/**
* Posting to Facebook Wall
* */
btnPostToWall.setOnClickListener(new View.OnClickListener() {

@Override
public void onClick(View v) {
postToWall();
}
});

/**
* Showing Access Tokens
* */
btnShowAccessTokens.setOnClickListener(new View.OnClickListener() {

@Override
public void onClick(View v) {
showAccessTokens();
}
});

}

/**
* Function to login into facebook
* */
@SuppressWarnings("deprecation")
public void loginToFacebook() {

mPrefs = getPreferences(MODE_PRIVATE);
String access_token = mPrefs.getString("access_token", null);
long expires = mPrefs.getLong("access_expires", 0);

if (access_token != null) {
facebook.setAccessToken(access_token);

btnFbLogin.setVisibility(View.INVISIBLE);

// Making get profile button visible
btnFbGetProfile.setVisibility(View.VISIBLE);

// Making post to wall visible
btnPostToWall.setVisibility(View.VISIBLE);

// Making show access tokens button visible
btnShowAccessTokens.setVisibility(View.VISIBLE);

Log.d("FB Sessions", "" + facebook.isSessionValid());
}

if (expires != 0) {
facebook.setAccessExpires(expires);
}

if (!facebook.isSessionValid()) {
facebook.authorize(this,
new String[] { "email", "publish_stream" },
new DialogListener() {

@Override
public void onCancel() {
// Function to handle cancel event
}

@Override
public void onComplete(Bundle values) {
// Function to handle complete event
// Edit Preferences and update facebook acess_token
SharedPreferences.Editor editor = mPrefs.edit();
editor.putString("access_token",
facebook.getAccessToken());
editor.putLong("access_expires",
facebook.getAccessExpires());
editor.commit();

// Making Login button invisible
btnFbLogin.setVisibility(View.INVISIBLE);

// Making logout Button visible
btnFbGetProfile.setVisibility(View.VISIBLE);

// Making post to wall visible
btnPostToWall.setVisibility(View.VISIBLE);

// Making show access tokens button visible
btnShowAccessTokens.setVisibility(View.VISIBLE);
}

@Override
public void onError(DialogError error) {
// Function to handle error

}

@Override
public void onFacebookError(FacebookError fberror) {
// Function to handle Facebook errors

}

});
}
}

@Override
public void onActivityResult(int requestCode, int resultCode, Intent data) {
super.onActivityResult(requestCode, resultCode, data);
facebook.authorizeCallback(requestCode, resultCode, data);
}


/**
* Get Profile information by making request to Facebook Graph API
* */
@SuppressWarnings("deprecation")
public void getProfileInformation() {
mAsyncRunner.request("me", new RequestListener() {
@Override
public void onComplete(String response, Object state) {
Log.d("Profile", response);
String json = response;
try {
// Facebook Profile JSON data
JSONObject profile = new JSONObject(json);

// getting name of the user
final String name = profile.getString("name");

// getting email of the user
final String email = profile.getString("email");

runOnUiThread(new Runnable() {

@Override
public void run() {
Toast.makeText(getApplicationContext(), "Name: " + name + "\nEmail: " + email, Toast.LENGTH_LONG).show();
}

});


} catch (JSONException e) {
e.printStackTrace();
}
}

@Override
public void onIOException(IOException e, Object state) {
}

@Override
public void onFileNotFoundException(FileNotFoundException e,
Object state) {
}

@Override
public void onMalformedURLException(MalformedURLException e,
Object state) {
}

@Override
public void onFacebookError(FacebookError e, Object state) {
}
});
}

/**
* Function to post to facebook wall
* */
@SuppressWarnings("deprecation")
public void postToWall() {
// post on user's wall.
facebook.dialog(this, "feed", new DialogListener() {

@Override
public void onFacebookError(FacebookError e) {
}

@Override
public void onError(DialogError e) {
}

@Override
public void onComplete(Bundle values) {
}

@Override
public void onCancel() {
}
});

}

/**
* Function to show Access Tokens
* */
public void showAccessTokens() {
String access_token = facebook.getAccessToken();

Toast.makeText(getApplicationContext(),
"Access Token: " + access_token, Toast.LENGTH_LONG).show();
}

/**
* Function to Logout user from Facebook
* */
@SuppressWarnings("deprecation")
public void logoutFromFacebook() {
mAsyncRunner.logout(this, new RequestListener() {
@Override
public void onComplete(String response, Object state) {
Log.d("Logout from Facebook", response);
if (Boolean.parseBoolean(response) == true) {
runOnUiThread(new Runnable() {

@Override
public void run() {
// make Login button visible
btnFbLogin.setVisibility(View.VISIBLE);

// making all remaining buttons invisible
btnFbGetProfile.setVisibility(View.INVISIBLE);
btnPostToWall.setVisibility(View.INVISIBLE);
btnShowAccessTokens.setVisibility(View.INVISIBLE);
}

});

}
}

@Override
public void onIOException(IOException e, Object state) {
}

@Override
public void onFileNotFoundException(FileNotFoundException e,
Object state) {
}

@Override
public void onMalformedURLException(MalformedURLException e,
Object state) {
}

@Override
public void onFacebookError(FacebookError e, Object state) {
}
});
}

}


You can download the source code First Android.

DialogFragment in Android

$
0
0
Hi Guys!

In this tutorial we are learning about the dialog fragment.
A fragment that displays a dialog window, floating on top of its activity's window. This fragment contains a Dialog object, which it displays as appropriate based on the fragment's state. Control of the dialog (deciding when to show, hide, dismiss it) should be done through the API here, not with direct calls on the dialog.
More detail about the dialog fragment visit the android developer siteDialog Fragment.

So lets start the coding about the alert dialog in Fragment.

main.xml


MyAlertDialog,java

package com.sunil.alert;

import android.app.AlertDialog;
import android.app.Dialog;
import android.app.DialogFragment;
import android.content.DialogInterface;
import android.content.DialogInterface.OnClickListener;
import android.os.Bundle;
import android.widget.Toast;

public class MyAlertDialogWIndow extends DialogFragment {

@Override
public Dialog onCreateDialog(Bundle savedInstanceState) {

OnClickListener positiveClick = new OnClickListener() {
@Override
public void onClick(DialogInterface dialog, int which) {
Toast.makeText(getActivity().getBaseContext(), "Application finishing ...", Toast.LENGTH_SHORT).show();
getActivity().finish();
}
};

OnClickListener negativeClick = new OnClickListener() {
@Override
public void onClick(DialogInterface dialog, int which) {
Toast.makeText(getActivity().getBaseContext(), "No option selecting", Toast.LENGTH_SHORT).show();

}
};

AlertDialog.Builder builder = new AlertDialog.Builder(getActivity());
builder.setMessage("Do you want Yes or No ?");
builder.setNegativeButton("No", negativeClick);
builder.setPositiveButton("Yes", positiveClick);
builder.setTitle("Confirmation");
Dialog dialog = builder.create();
return dialog;
}

}

MainActivity.java

package com.sunil.alert;

import com.sunil.alert.R;
import android.app.Activity;
import android.app.FragmentManager;
import android.os.Bundle;
import android.view.View;
import android.view.View.OnClickListener;
import android.widget.Button;

public class MainActivity extends Activity implements OnClickListener{
/** Called when the activity is first created. */
@Override
public void onCreate(Bundle savedInstanceState) {
super.onCreate(savedInstanceState);
setContentView(R.layout.main);

Button click = (Button) findViewById(R.id.btn_quit);
click.setOnClickListener(this);

}
@Override
public void onClick(View v) {
FragmentManager fm = getFragmentManager();
MyAlertDialogWIndow alert = new MyAlertDialogWIndow();
alert.show(fm, "Alert_Dialog");

}
}


You can download the source code Dialog Fragment

ActionBar Tab ListFragment in Android

$
0
0
Hi Guys!

In this tutorial we are learning about the Action Bar Tab in android.
Action bar was introduced from API level 11. In this post I will explain how to create tab in action bar with fragments. The final result is shown below where user can move between tabs.

After these steps we have to create our tabs and add it to the action bar. In our example we create three different tabs. What we want is when user touches one of the tab the UI content changes. To achieve it we need two things:
  • Fragment that fills the UI when user changes the tab according to the tab selected
  • A listener that gets notification when user interacts with the tabs
 So we are using the List Fragment to show the list content when user touch on tab. So view the video for the same.


Lets Start the coding to make the tab by Action bar in Fragment Activity.

main_activity.xml


list_fragment.xml


MainActivity.java

package com.sunil.actionbartab;

import com.sunil.actionbartab.R;
import android.app.ActionBar;
import android.app.FragmentTransaction;
import android.os.Bundle;
import android.support.v4.app.Fragment;
import android.support.v4.app.FragmentActivity;
import android.view.Gravity;
import android.view.LayoutInflater;
import android.view.Menu;
import android.view.View;
import android.view.ViewGroup;
import android.widget.TextView;

public class MainActivity extends FragmentActivity implements ActionBar.TabListener {

private static final String STATE_SELECTED_NAVIGATION_ITEM = "selected_navigation_item";

@Override
public void onCreate(Bundle savedInstanceState) {
super.onCreate(savedInstanceState);
setContentView(R.layout.activity_main);

// Set up the action bar.
final ActionBar actionBar = getActionBar();
actionBar.setNavigationMode(ActionBar.NAVIGATION_MODE_TABS);

// For each of the sections in the app, add a tab to the action bar.
actionBar.addTab(actionBar.newTab().setText("My Friends").setTabListener(this));
actionBar.addTab(actionBar.newTab().setText(R.string.title_section2).setTabListener(this));
actionBar.addTab(actionBar.newTab().setText(R.string.title_section3).setTabListener(this));
}

@Override
public void onRestoreInstanceState(Bundle savedInstanceState) {
if (savedInstanceState.containsKey(STATE_SELECTED_NAVIGATION_ITEM)) {
getActionBar().setSelectedNavigationItem(savedInstanceState.getInt(STATE_SELECTED_NAVIGATION_ITEM));
}
}

@Override
public void onSaveInstanceState(Bundle outState) {
outState.putInt(STATE_SELECTED_NAVIGATION_ITEM, getActionBar().getSelectedNavigationIndex());
}

@Override
public boolean onCreateOptionsMenu(Menu menu) {
getMenuInflater().inflate(R.menu.activity_main, menu);
return true;
}


@Override
public void onTabUnselected(ActionBar.Tab tab, FragmentTransaction fragmentTransaction) {
}

@Override
public void onTabSelected(ActionBar.Tab tab, FragmentTransaction fragmentTransaction) {

/**
* On first tab we will show our list
*/
if (tab.getPosition() == 0) {
MyFriendsListFragment simpleListFragment = new MyFriendsListFragment();
getSupportFragmentManager().beginTransaction().replace(R.id.container, simpleListFragment).commit();
}
else if (tab.getPosition() == 1) {
AndroidList androidlidt = new AndroidList();
getSupportFragmentManager().beginTransaction().replace(R.id.container, androidlidt).commit();
}


else {

AndroidVersionList androidversionlist = new AndroidVersionList();
getSupportFragmentManager().beginTransaction().replace(R.id.container, androidversionlist).commit();
}
}

@Override
public void onTabReselected(ActionBar.Tab tab, FragmentTransaction fragmentTransaction) {
}
}

MyFriendsListFragment.java

package com.sunil.actionbartab;

import com.sunil.actionbartab.R;

import android.os.Bundle;
import android.support.v4.app.ListFragment;
import android.view.LayoutInflater;
import android.view.View;
import android.view.ViewGroup;
import android.widget.ArrayAdapter;
import android.widget.ListAdapter;
import android.widget.ListView;
import android.widget.Toast;

public class MyFriendsListFragment extends ListFragment {

private String myfriends[];

public MyFriendsListFragment() {

myfriends = new String[] {
"Sandeep Pal",
"Abhi Tripathi",
"Amit Verma",
"Awadhesh Diwakar",
"Shishir Verma",
"Ravi",
};
}


@Override
public void onCreate(Bundle savedInstanceState) {
super.onCreate(savedInstanceState);

ListAdapter listAdapter = new ArrayAdapter(getActivity(), android.R.layout.simple_list_item_1, myfriends);
setListAdapter(listAdapter);
}

@Override
public View onCreateView(LayoutInflater inflater, ViewGroup container, Bundle savedInstanceState) {
return inflater.inflate(R.layout.list_fragment, container, false);
}

@Override
public void onListItemClick(ListView list, View v, int position, long id) {

Toast.makeText(getActivity(), getListView().getItemAtPosition(position).toString(), Toast.LENGTH_LONG).show();
}
}

AndroidList.java

package com.sunil.actionbartab;

import android.os.Bundle;
import android.support.v4.app.ListFragment;
import android.view.LayoutInflater;
import android.view.View;
import android.view.ViewGroup;
import android.widget.ArrayAdapter;
import android.widget.ListAdapter;
import android.widget.ListView;
import android.widget.Toast;

public class AndroidList extends ListFragment{

private String myandroidphone[];

public AndroidList() {

myandroidphone = new String[] {
"Samsung Gallexy S",
"Sony Experia",
"Nokiya Lumia",
"Google Nuxes",
"Micromax",

};
}

@Override
public void onCreate(Bundle savedInstanceState) {
super.onCreate(savedInstanceState);

ListAdapter listAdapter = new ArrayAdapter(getActivity(), android.R.layout.simple_list_item_1, myandroidphone);
setListAdapter(listAdapter);
}

@Override
public View onCreateView(LayoutInflater inflater, ViewGroup container, Bundle savedInstanceState) {
return inflater.inflate(R.layout.list_fragment, container, false);
}

@Override
public void onListItemClick(ListView list, View v, int position, long id) {

Toast.makeText(getActivity(), getListView().getItemAtPosition(position).toString(), Toast.LENGTH_LONG).show();
}
}

AndroidVersionList.java

package com.sunil.actionbartab;

import android.os.Bundle;
import android.support.v4.app.ListFragment;
import android.view.LayoutInflater;
import android.view.View;
import android.view.ViewGroup;
import android.widget.ArrayAdapter;
import android.widget.ListAdapter;
import android.widget.ListView;
import android.widget.Toast;

public class AndroidVersionList extends ListFragment{

private String myandroidversions[];
public AndroidVersionList() {
myandroidversions= new String[] {
"Jelly Bean",
"Ice cream Sandwich",
"GingerBread",
"HoneyComb",
"Friyo",

};

}
@Override
public void onCreate(Bundle savedInstanceState) {
super.onCreate(savedInstanceState);

ListAdapter listAdapter = new ArrayAdapter(getActivity(), android.R.layout.simple_list_item_1, myandroidversions);
setListAdapter(listAdapter);
}

@Override
public View onCreateView(LayoutInflater inflater, ViewGroup container, Bundle savedInstanceState) {
return inflater.inflate(R.layout.list_fragment, container, false);
}

@Override
public void onListItemClick(ListView list, View v, int position, long id) {

Toast.makeText(getActivity(), getListView().getItemAtPosition(position).toString(), Toast.LENGTH_LONG).show();
}
}


You can download the source code ActionBar ListFregment

ActionBar Tab Navigation in Android

$
0
0
Hi Guys!

In this tutorial we are learning about the ActionBar Tab Navigation means Swipe the Tab.
Swipe views provide lateral navigation between sibling screens such as tabs with a horizontal finger gesture (a pattern sometimes known as horizontal paging). This lesson teaches you how to create a tab layout with swipe views for switching between tabs.

For more details about the swipe the Tabs visit the android developer site Tab Swipe(Navigation).
I have implemented the tabs swipe by using the action bar and Fragment Page Adapter that is available in the android-support v4 library.
Implementation of PagerAdapter that represents each page as a Fragment that is persistently kept in the fragment manager as long as the user can return to the page.
For more details about the Fragment Page Adapter, please visit the android developer siteFragment Page Adapter.

With help of Fragment page Adapter we have implemented the Tabs Swipe(Navigation). Please watch the video for same.


So lets start the coding tabs swipe by using the action bar and fragment page adapter.


activity_main.xml


MainActivity.java

package com.sunil.actionbartabnavigation;

import com.sunil.actionabrtabnavigation.R;
import android.app.ActionBar;
import android.app.ActionBar.Tab;
import android.os.Bundle;
import android.support.v4.app.FragmentActivity;
import android.support.v4.app.FragmentManager;
import android.support.v4.view.ViewPager;
import android.view.Menu;

public class MainActivity extends FragmentActivity {

ActionBar actionabar;
ViewPager viewpager;

@Override
protected void onCreate(Bundle savedInstanceState) {
super.onCreate(savedInstanceState);
setContentView(R.layout.activity_main);

actionabar = getActionBar();
actionabar.setNavigationMode(ActionBar.NAVIGATION_MODE_TABS);

viewpager = (ViewPager) findViewById(R.id.pager);
FragmentManager fm = getSupportFragmentManager();

/** Defining a listener for pageChange */
ViewPager.SimpleOnPageChangeListener pageChangeListener = new ViewPager.SimpleOnPageChangeListener(){
@Override
public void onPageSelected(int position) {
super.onPageSelected(position);
actionabar.setSelectedNavigationItem(position);
}
};

/** Setting the pageChange listner to the viewPager */
viewpager.setOnPageChangeListener(pageChangeListener);

/** Creating an instance of FragmentPagerAdapter */
MyFragmentPagerAdapter fragmentPagerAdapter = new MyFragmentPagerAdapter(fm);

viewpager.setAdapter(fragmentPagerAdapter);
actionabar.setDisplayShowTitleEnabled(true);

/** Defining tab listener */
ActionBar.TabListener tabListener = new ActionBar.TabListener() {

@Override
public void onTabReselected(Tab arg0, android.app.FragmentTransaction arg1) {

}

@Override
public void onTabSelected(Tab tab, android.app.FragmentTransaction ft) {
viewpager.setCurrentItem(tab.getPosition());

}

@Override
public void onTabUnselected(Tab tab, android.app.FragmentTransaction ft) {

}
};

/** Creating Android Tab */
// Tab tab = actionabar.newTab().setText("My Friends").setIcon(R.drawable.myfriends).setTabListener(tabListener);
Tab tab = actionabar.newTab().setText("My Friends").setTabListener(tabListener);
actionabar.addTab(tab);
tab = actionabar.newTab().setText("Android Version").setTabListener(tabListener);
actionabar.addTab(tab);
tab = actionabar.newTab().setText("Android Phones").setTabListener(tabListener);
actionabar.addTab(tab);


}

@Override
public boolean onCreateOptionsMenu(Menu menu) {
// Inflate the menu; this adds items to the action bar if it is present.
getMenuInflater().inflate(R.menu.main, menu);
return true;
}

}

MyFriendsListFragment.java

package com.sunil.actionbartabnavigation;

import android.os.Bundle;
import android.support.v4.app.ListFragment;
import android.view.LayoutInflater;
import android.view.View;
import android.view.ViewGroup;
import android.widget.ArrayAdapter;
import android.widget.ListView;


public class MyFriendsListFragment extends ListFragment{

/** An array of items to display in ArrayList */
String myfriends_list[] = new String[]{
"Abhi Tripathi",
"Sandeep Pal",
"Avi Diwakar",
"Shishir Verma",
"Amit Verma"
};


@Override
public View onCreateView(LayoutInflater inflater, ViewGroup container,
Bundle savedInstanceState) {

/** Creating array adapter to set data in listview */
ArrayAdapter adapter = new ArrayAdapter(getActivity().getBaseContext(), android.R.layout.simple_list_item_multiple_choice, myfriends_list);
setListAdapter(adapter);

return super.onCreateView(inflater, container, savedInstanceState);

}

@Override
public void onStart() {
super.onStart();
/** Setting the multiselect choice mode for the listview */
getListView().setChoiceMode(ListView.CHOICE_MODE_MULTIPLE);

}
}

MyAndroidPhonesListFragment.java

package com.sunil.actionbartabnavigation;

import android.os.Bundle;
import android.support.v4.app.ListFragment;
import android.view.LayoutInflater;
import android.view.View;
import android.view.ViewGroup;
import android.widget.ArrayAdapter;
import android.widget.ListView;

public class MyAndroidPhonesListFragment extends ListFragment{

private String myandroidphone[]=new String[]{
"Samsung Android",
"Sony Experia",
"Micromax",
"Nokiya Lumia",
"Windows phone"
};

@Override
public View onCreateView(LayoutInflater inflater, ViewGroup container, Bundle savedInstanceState){

ArrayAdapter adapter = new ArrayAdapter(getActivity().getBaseContext(), android.R.layout.simple_list_item_multiple_choice, myandroidphone);
setListAdapter(adapter);

return super.onCreateView(inflater, container, savedInstanceState);

}

@Override
public void onStart() {
super.onStart();
getListView().setChoiceMode(ListView.CHOICE_MODE_MULTIPLE);

}
}

MyAndroidVersionListFragment.java

package com.sunil.actionbartabnavigation;

import android.os.Bundle;
import android.support.v4.app.ListFragment;
import android.view.LayoutInflater;
import android.view.View;
import android.view.ViewGroup;
import android.widget.ArrayAdapter;
import android.widget.ListView;

public class MyAndroidVersionListFragment extends ListFragment{

/** An array of items to display in ArrayList */
String android_versions[] = new String[]{
"Jelly Bean",
"IceCrean Sandwich",
"Honey Comb",
"Gingerbread",
"Froyo"
};

@Override
public View onCreateView(LayoutInflater inflater, ViewGroup container, Bundle savedInstanceState){

ArrayAdapter adapter = new ArrayAdapter(getActivity().getBaseContext(), android.R.layout.simple_list_item_multiple_choice, android_versions);
setListAdapter(adapter);

return super.onCreateView(inflater, container, savedInstanceState);

}

@Override
public void onStart() {
super.onStart();
getListView().setChoiceMode(ListView.CHOICE_MODE_SINGLE);

}
}

MyFragmentPagerAdapter.java

package com.sunil.actionbartabnavigation;


import android.os.Bundle;
import android.support.v4.app.Fragment;
import android.support.v4.app.FragmentManager;
import android.support.v4.app.FragmentPagerAdapter;

public class MyFragmentPagerAdapter extends FragmentPagerAdapter{

final int PAGE_COUNT = 3;

public MyFragmentPagerAdapter(FragmentManager fm) {
super(fm);

}

/** This method will be invoked when a page is requested to create */
@Override
public Fragment getItem(int arg0) {
Bundle data = new Bundle();
switch(arg0){

/** Android tab is selected */
case 0:
MyFriendsListFragment myfriends = new MyFriendsListFragment();
data.putInt("current_page", arg0+1);
myfriends.setArguments(data);
return myfriends;

case 1:
MyAndroidVersionListFragment androidversion = new MyAndroidVersionListFragment();
data.putInt("current_page", arg0+1);
androidversion.setArguments(data);
return androidversion;

case 2:
MyAndroidPhonesListFragment androidphone = new MyAndroidPhonesListFragment();
data.putInt("current_page", arg0+1);
androidphone.setArguments(data);
return androidphone;
}

return null;
}

/** Returns the number of pages */
@Override
public int getCount() {
return PAGE_COUNT;
}

}


You can download the source codeAction Bar Tab Navigation

Section Header Listview in android

$
0
0
Hi Guys,

Today we are learning about the section header in android.
Listview are commonly used to display a large set of similar data. But in the section header list we can show the similar data list in the different and separate section of the list view.
Here I am using the adapter class for loading the view of list one by one by using get view method.
So lets start the coding about the section header.

layout/main.xml


layout/list_item_section.xml


layout/list_item_enty.xml


Item.java

package com.sunil.util;

public interface Item {

public boolean isSection();

}

SectionItem.java

package com.sunil.util;

public class SectionItem implements Item{

private final String title;

public SectionItem(String title) {
this.title = title;
}

public String getTitle(){
return title;
}

@Override
public boolean isSection() {
return true;
}

}

EntryItem.java

package com.sunil.util;


public class EntryItem implements Item{

public final String title;
public final String subtitle;

public EntryItem(String title, String subtitle) {
this.title = title;
this.subtitle = subtitle;
}

@Override
public boolean isSection() {
return false;
}

}

EntryAdapter.java

package com.sunil.util;

import java.util.ArrayList;

import android.content.Context;
import android.view.LayoutInflater;
import android.view.View;
import android.view.ViewGroup;
import android.widget.ArrayAdapter;
import android.widget.TextView;
import com.sunil.sectionlist.R;

public class EntryAdapter extends ArrayAdapter {

private Context context;
private ArrayList items;
private LayoutInflater vi;

public EntryAdapter(Context context,ArrayList items) {
super(context,0, items);
this.context = context;
this.items = items;
vi = (LayoutInflater)context.getSystemService(Context.LAYOUT_INFLATER_SERVICE);
}


@Override
public View getView(int position, View convertView, ViewGroup parent) {
View v = convertView;

final Item i = items.get(position);
if (i != null) {
if(i.isSection()){
SectionItem si = (SectionItem)i;
v = vi.inflate(R.layout.list_item_section, null);

v.setOnClickListener(null);
v.setOnLongClickListener(null);
v.setLongClickable(false);

final TextView sectionView = (TextView) v.findViewById(R.id.list_item_section_text);
sectionView.setText(si.getTitle());

}else{
EntryItem ei = (EntryItem)i;
v = vi.inflate(R.layout.list_item_entry, null);
final TextView title = (TextView)v.findViewById(R.id.list_item_entry_title);
final TextView subtitle = (TextView)v.findViewById(R.id.list_item_entry_summary);


if (title != null)
title.setText(ei.title);
if(subtitle != null)
subtitle.setText(ei.subtitle);
}
}
return v;
}

}

SectionListExampleActivity.java

package com.sunil.sectionactivity;

import java.util.ArrayList;

import com.sunil.util.EntryAdapter;
import com.sunil.util.EntryItem;
import com.sunil.util.Item;
import com.sunil.util.SectionItem;

import android.app.Activity;
import android.os.Bundle;
import android.view.View;
import android.widget.AdapterView;
import android.widget.AdapterView.OnItemClickListener;
import android.widget.ListView;
import android.widget.Toast;
import com.sunil.sectionlist.R;

public class SectionListExampleActivity extends Activity implements OnItemClickListener{

ArrayList items = new ArrayList();
ListView listview=null;

@Override
public void onCreate(Bundle savedInstanceState) {
super.onCreate(savedInstanceState);
setContentView(R.layout.main);

listview=(ListView)findViewById(R.id.listView_main);

items.add(new SectionItem("My Friends"));
items.add(new EntryItem("Abhi Tripathi", "Champpu"));
items.add(new EntryItem("Sandeep Pal", "Sandy kaliya"));
items.add(new EntryItem("Amit Verma", "Budhiya"));
items.add(new EntryItem("Awadhesh Diwaker ", "Dadda"));

items.add(new SectionItem("Android Version"));
items.add(new EntryItem("Jelly Bean", "android 4.2"));
items.add(new EntryItem("IceCream Sandwich", "android 4.0"));
items.add(new EntryItem("Honey Comb", "android 3.0"));
items.add(new EntryItem("Ginger Bread ", "android 2.2"));

items.add(new SectionItem("Android Phones"));
items.add(new EntryItem("Samsung", "Gallexy"));
items.add(new EntryItem("Sony Ericson", "Xperia"));
items.add(new EntryItem("Nokiya", "Lumia"));

EntryAdapter adapter = new EntryAdapter(this, items);
listview.setAdapter(adapter);
listview.setOnItemClickListener(this);
}


@Override
public void onItemClick(AdapterView arg0, View arg1, int position, long arg3) {

EntryItem item = (EntryItem)items.get(position);
Toast.makeText(this, "You clicked " + item.title , Toast.LENGTH_SHORT).show();
}
}


You can download the source code Section Header ListView.

Cheers Guys! 

OrmLite Database in Android

$
0
0
Hi Guys!,

Today we are learning about the OrmLite database in android.
OrmLite is the lightweight java ORM supports for android Sqlite Database. The full OrmLite is Object Relational Mapping (ORMLite). and it provide some light weight functionality to store and retrieve java objects. OrmLite avoiding the complexity and more standard  Object Relational Mapping.

ORMLite supports more than one database  using JDBC and also sqlite with native calls to android api. Access Object classes. also provides simple and flexible query using QueryBuilder. Auto generates SQL to create and drop database tables and its have basic supports for databa
OrmLite simpley add Objects of java using annotations and it have powerful abstract Database Object classes also provides simple and flexible query using QueryBuilder. Auto generates SQL to create and drop database tables. And it have basic supports for database transactions.

Object Relational Mapping Lite (ORM Lite) provides some lightweight functionality for persisting Java objects to SQL databases while avoiding the complexity and overhead of more standard ORM packages. It supports a number of SQL databases using JDBC and also supports Sqlite with native calls to Android OS database APIs.

Users that are connecting to SQL databases via JDBC connections will need to download the ormlite-jdbc-4.46.jarand ormlite-core-4.46.jar files. For use with Android applications, you should download the ormlite-android-4.46.jar and ormlite-core-4.46.jar files.

Here is the link to download these jar filesOrmLite Jars.
Or more ablout the ORMLite you can visit the ORL Developer site Here.

So In that scenario you need to first create the Pojo class means data model. Lets start the coding.


main.xml


row.xml


Person.java

package com.sunil.ormlite;

import com.j256.ormlite.field.DatabaseField;

public class Person {

@DatabaseField(generatedId = true)
private int id;
@DatabaseField
private String name;

public int getId() {
return id;
}

public void setId(int id) {
this.id = id;
}

public String getName() {
return name;
}

public void setName(String firstname) {
this.name = firstname;
}

}

DatabaseHelper.java

package com.sunil.ormlite;
import java.sql.SQLException;
import java.util.List;

import android.content.Context;
import android.database.sqlite.SQLiteDatabase;
import android.util.Log;

import com.j256.ormlite.android.apptools.OrmLiteSqliteOpenHelper;
import com.j256.ormlite.dao.Dao;
import com.j256.ormlite.dao.RuntimeExceptionDao;
import com.j256.ormlite.support.ConnectionSource;
import com.j256.ormlite.table.TableUtils;

public class DatabaseHelper extends OrmLiteSqliteOpenHelper {

private Context context;
private static final String DATABASE_NAME = "ormliteandroid.db";
private static final int DATABASE_VERSION = 1;

private Dao simpleDao = null;
private RuntimeExceptionDao simpleRuntimeDao = null;

public DatabaseHelper(Context context) {
super(context, DATABASE_NAME, null, DATABASE_VERSION);
context = context;
}

public Dao getDao() throws SQLException {
if (simpleDao == null) {
simpleDao = getDao(Person.class);
}
return simpleDao;
}

public RuntimeExceptionDao getSimpleDataDao() {
if (simpleRuntimeDao == null) {
simpleRuntimeDao = getRuntimeExceptionDao(Person.class);
}
return simpleRuntimeDao;
}

//method for list of person
public List GetData()
{
DatabaseHelper helper = new DatabaseHelper(context);
RuntimeExceptionDao simpleDao = helper.getSimpleDataDao();
List list = simpleDao.queryForAll();
return list;
}

//method for insert data
public int addData(Person person)
{
RuntimeExceptionDao dao = getSimpleDataDao();
int i = dao.create(person);
return i;
}

//method for delete all rows
public void deleteAll()
{
RuntimeExceptionDao dao = getSimpleDataDao();
List list = dao.queryForAll();
dao.delete(list);
}

@Override
public void close() {
super.close();
simpleRuntimeDao = null;
}

@Override
public void onCreate(SQLiteDatabase db, ConnectionSource connectionSource) {
try {
Log.i(DatabaseHelper.class.getName(), "onCreate");
TableUtils.createTable(connectionSource, Person.class);
} catch (SQLException e) {
Log.e(DatabaseHelper.class.getName(), "Can't create database", e);
throw new RuntimeException(e);
}
}

@Override
public void onUpgrade(SQLiteDatabase db, ConnectionSource connectionSource, int oldVersion, int newVersion) {
try {
Log.i(DatabaseHelper.class.getName(), "onUpgrade");
TableUtils.dropTable(connectionSource, Person.class, true);
onCreate(db, connectionSource);
} catch (SQLException e) {
Log.e(DatabaseHelper.class.getName(), "Can't drop databases", e);
throw new RuntimeException(e);
}
}
}

NameAdapter.java

package com.sunil.ormlite;

import java.util.List;

import com.sunil.ormlite.R;

import android.content.Context;
import android.view.LayoutInflater;
import android.view.View;
import android.view.ViewGroup;
import android.widget.ArrayAdapter;
import android.widget.TextView;

public class NameAdapter extends ArrayAdapter {
private Context mContext;
private int row;
private List list ;

public NameAdapter(Context context, int textViewResourceId, List list) {
super(context, textViewResourceId, list);

this.mContext=context;
this.row=textViewResourceId;
this.list=list;
}

@Override
public View getView(int position, View convertView, ViewGroup parent) {
View view = convertView;
ViewHolder holder;
if (view == null) {
LayoutInflater inflater = (LayoutInflater) mContext
.getSystemService(Context.LAYOUT_INFLATER_SERVICE);
view = inflater.inflate(row, null);

holder = new ViewHolder();
view.setTag(holder);
} else {
holder = (ViewHolder) view.getTag();
}


if ((list == null) || ((position + 1) > list.size()))
return view; // Can't extract item

Person obj = list.get(position);

holder.name = (TextView)view.findViewById(R.id.tvname);

if(null!=holder.name&&null!=obj&&obj.getName().length()!=0){
holder.name.setText(obj.getName());
}


return view;
}

public static class ViewHolder {
public TextView name;
}
}

MainActivity.java

package com.sunil.ormlite;

import java.util.List;

import com.sunil.ormlite.R;

import android.app.Activity;
import android.app.AlertDialog;
import android.content.DialogInterface;
import android.os.Bundle;
import android.text.TextUtils;
import android.view.View;
import android.widget.AdapterView;
import android.widget.AdapterView.OnItemClickListener;
import android.widget.EditText;
import android.widget.ListView;
import android.widget.Toast;

public class MainActivity extends Activity implements OnItemClickListener {
EditText etEntry;
ListView listView;
NameAdapter adapter = null;
DatabaseHelper helper;
List list;

@Override
public void onCreate(Bundle savedInstanceState) {
super.onCreate(savedInstanceState);
setContentView(R.layout.main);

listView = (ListView) findViewById(R.id.listView1);
listView.setOnItemClickListener(this);

etEntry = (EditText) findViewById(R.id.etentry);

helper = new DatabaseHelper(getApplicationContext());

setDataToAdapter();

}

public void adddata(View v) {
String strName = etEntry.getText().toString().trim();
if (TextUtils.isEmpty(strName)) {
showToast("Please Add your Name!!!");
return;
}

Person person = new Person();
person.setName(strName);

helper.addData(person);

showToast("Data Successfully Added");

setDataToAdapter();

}

private void setDataToAdapter() {

list = helper.GetData();

adapter = new NameAdapter(this, R.layout.row, list);
listView.setAdapter(adapter);

}

private void showToast(String msg) {
Toast.makeText(this, msg, Toast.LENGTH_SHORT).show();
}

@SuppressWarnings("deprecation")
public void deletedata(View v) {

list = helper.GetData();

if (null != list && list.size() > 0) {
AlertDialog alert = new AlertDialog.Builder(MainActivity.this)
.create();
alert.setTitle("Delete ?");
alert.setMessage("Are you sure want to delete All data from Database");

alert.setButton("No", new DialogInterface.OnClickListener() {

@Override
public void onClick(DialogInterface dialog, int which) {
dialog.dismiss();
}
});
alert.setButton2("Yes", new DialogInterface.OnClickListener() {

@Override
public void onClick(DialogInterface dialog, int which) {
dialog.dismiss();

helper.deleteAll();
etEntry.setText("");
showToast("Removed All Data!!!");

setDataToAdapter();
}
});
alert.show();
} else {
showToast("No data found from the Database");
}
}

@Override
public void onItemClick(AdapterView parent, View view, int position,
long id) {
showToast(list.get(position).getName());
}
}

You can download the source code OrmLite Database in Android

Out Of Memory Exception during decode image from imagepath

$
0
0
Hi Guys!

Today In this tutorial we are sharing the code and knowledge about the out of memory exception when we are loading the image on imageview in the listview.
Images come in all shapes and sizes. In many cases they are larger than required for a typical application user interface (UI). For example, the system Gallery application displays photos taken using your Android devices's camera which are typically much higher resolution than the screen density of your device.
Given that you are working with limited memory, ideally you only want to load a lower resolution version in memory. The lower resolution version should match the size of the UI component that displays it. An image with a higher resolution does not provide any visible benefit, but still takes up precious memory and incurs additional performance overhead due to additional on the fly scaling.

Most of the time when we are taking the picture from the Camera or from the Gallery the image is too large. In that case when we are going to decode the image from the image path then it throw the out of memory exception just because of the when decoding the image that time it store in heap of memory. That contain the small size for executing this process. That's why it give the out of memory exception.

So the solution is: we need to decode the via FileOutPutStream or make it first re size the image after we can decode. Both are working perfect in my side. But when we showing the image in list view and we are not resizing the image then our listview working very slow just because of the large image size. So we need to scale the image first.

Here I am giving the three option to decode the image from the image path.

1. When decode the image via normal way.

  String imageInSD = "/sdcard/UserImages/" + userImageName;
Bitmap bitmap = BitmapFactory.decodeFile(imageInSD);

It gives the most of the timeout of memory exceptionwhen image size is large. So we need to use Bitmap Option for the same.
    String imageInSD = "/sdcard/UserImages/" + userImageName;
BitmapFactory.Options options=null;
options = new BitmapFactory.Options();
options.inSampleSize = 2;
Bitmap bitmap = BitmapFactory.decodeFile(imageInSD, null, options);


But this is not a good solution for the decode the image. Some time it also gives the Out Of Memory Exception . So let comes in the second way.

2. Decode the Image from the image path via FileInputStream and FileOutputStream.


public static Bitmap convertBitmap(String path)   {

Bitmap bitmap=null;
BitmapFactory.Options bfOptions=new BitmapFactory.Options();
bfOptions.inDither=false; //Disable Dithering mode
bfOptions.inPurgeable=true; //Tell to gc that whether it needs free memory, the Bitmap can be cleared
bfOptions.inInputShareable=true; //Which kind of reference will be used to recover the Bitmap data after being clear, when it will be used in the future
bfOptions.inTempStorage=new byte[32 * 1024];


File file=new File(path);
FileInputStream fs=null;
try {
fs = new FileInputStream(file);
} catch (FileNotFoundException e) {
e.printStackTrace();
}

try {
if(fs!=null)
{
bitmap=BitmapFactory.decodeFileDescriptor(fs.getFD(), null, bfOptions);
}
} catch (IOException e) {

e.printStackTrace();
} finally{
if(fs!=null) {
try {
fs.close();
} catch (IOException e) {

e.printStackTrace();
}
}
}

return bitmap;
}

It does not give the Exception, we can use this to show the image on a particular imageview.
But It have certain limitation, After the decode we can not make the scale of this bitmap. And Its size will be same as a large so it makes slow to show in the list veiw.
So lets come the third way to decode the image from the image path. This one is the best and optamized solution which have seen the above.
If you want to make a small image from large image with height and width like 60 and 60 and scroll the listview fast then use this concept

3. First Resize the Image Size and then after Decode the Image From Image Path.


public static Bitmap decodeSampledBitmapFromPath(String path, int reqWidth,
int reqHeight) {

final BitmapFactory.Options options = new BitmapFactory.Options();
options.inJustDecodeBounds = true;
BitmapFactory.decodeFile(path, options);

options.inSampleSize = calculateInSampleSize(options, reqWidth,
reqHeight);

// Decode bitmap with inSampleSize set
options.inJustDecodeBounds = false;
Bitmap bmp = BitmapFactory.decodeFile(path, options);
return bmp;
}

public static int calculateInSampleSize(BitmapFactory.Options options,
int reqWidth, int reqHeight) {

final int height = options.outHeight;
final int width = options.outWidth;
int inSampleSize = 1;

if (height > reqHeight || width > reqWidth) {
if (width > height) {
inSampleSize = Math.round((float) height / (float) reqHeight);
} else {
inSampleSize = Math.round((float) width / (float) reqWidth);
}
}
return inSampleSize;
}

If you want to decode the image from the Drawable or the Resources then use this way.

public static Bitmap decodeSampledBitmapFromResource(Resources res, int resId,
int reqWidth, int reqHeight) {

// First decode with inJustDecodeBounds=true to check dimensions
final BitmapFactory.Options options = new BitmapFactory.Options();
options.inJustDecodeBounds = true;
BitmapFactory.decodeResource(res, resId, options);

// Calculate inSampleSize
options.inSampleSize = calculateInSampleSize(options, reqWidth, reqHeight);

// Decode bitmap with inSampleSize set
options.inJustDecodeBounds = false;
return BitmapFactory.decodeResource(res, resId, options);
}


public static int calculateInSampleSize(
BitmapFactory.Options options, int reqWidth, int reqHeight) {
// Raw height and width of image
final int height = options.outHeight;
final int width = options.outWidth;
int inSampleSize = 1;

if (height > reqHeight || width > reqWidth) {

// Calculate ratios of height and width to requested height and width
final int heightRatio = Math.round((float) height / (float) reqHeight);
final int widthRatio = Math.round((float) width / (float) reqWidth);

// Choose the smallest ratio as inSampleSize value, this will guarantee
// a final image with both dimensions larger than or equal to the
// requested height and width.
inSampleSize = heightRatio < widthRatio ? heightRatio : widthRatio;
}

return inSampleSize;
}

If you want any help then visit the android developer siteHere.

I hope You Guys enjoying this concept. (PL do not forget to give feedback).
Cheers !!


Get the address using current latitude and longitude

$
0
0
Hi Guys,

Today I am sharing the code of getting the current address from the current latitude and longitude.
For implementing this concept we need to use the Geocoder. So here question is arises what is Geocoder?

Geocoder is a class for handling geocoding and reverse geocoding. Geocoding is the process of transforming a street address or other description of a location into a (latitude, longitude) coordinate. Reverse geocoding is the process of transforming a (latitude, longitude) coordinate into a (partial) address.

 The amount of detail in a reverse geocoded location description may vary, for example one might contain the full street address of the closest building, while another might contain only a city name and postal code.

The Geocoder class requires a backend service that is not included in the core android framework. The Geocoder query methods will return an empty list if there no backend service in the platform. Use the isPresent() method to determine whether a Geocoder implementation exists.
More about the GeoCoder and related method visit here GeoCoder

activity_main.xml


MainActivity.java

package com.sunil.address;

import java.io.IOException;
import java.util.List;
import java.util.Locale;

import android.app.Activity;
import android.app.ProgressDialog;
import android.content.Context;
import android.location.Address;
import android.location.Geocoder;
import android.os.AsyncTask;
import android.os.Bundle;
import android.util.Log;
import android.view.View;
import android.view.View.OnClickListener;
import android.widget.Button;
import android.widget.EditText;

import com.example.addressfromlatlong.R;


public class MainActivity extends Activity implements OnClickListener{

private EditText result;
private Button btngetAddress;
private Context context=null;
private ProgressDialog dialog = null;
@Override
protected void onCreate(Bundle savedInstanceState) {
super.onCreate(savedInstanceState);
setContentView(R.layout.activity_main);
context=this;

result=(EditText)findViewById(R.id.editText_result);
btngetAddress=(Button)findViewById(R.id.button_getAddress);
btngetAddress.setOnClickListener(this);


}
@Override
public void onClick(View arg0) {

dialog = ProgressDialog.show(context, "","Please wait..", true);
GetCurrentAddress currentadd=new GetCurrentAddress();
currentadd.execute();
}


public String getAddress(Context ctx, double latitude, double longitude) {
StringBuilder result = new StringBuilder();
try {
Geocoder geocoder = new Geocoder(ctx, Locale.getDefault());
List

addresses = geocoder.getFromLocation(latitude, longitude, 1);
if (addresses.size() > 0) {
Address address = addresses.get(0);

String locality=address.getLocality();
String city=address.getCountryName();
String region_code=address.getCountryCode();
String zipcode=address.getPostalCode();
double lat =address.getLatitude();
double lon= address.getLongitude();

result.append(locality+" ");
result.append(city+" "+ region_code+" ");
result.append(zipcode);

}
} catch (IOException e) {
Log.e("tag", e.getMessage());
}

return result.toString();
}

private class GetCurrentAddress extends AsyncTask {

@Override
protected String doInBackground(String... urls) {
// this lat and log we can get from current location but here we given hard coded
double latitude=12.916523125961666;
double longitude=77.61959824603072;

String address= getAddress(context, latitude, longitude);
return address;
}

@Override
protected void onPostExecute(String resultString) {
dialog.dismiss();
result.setText(resultString);

}
}
}


You can download the source code GetAddress

Call logs in Android

$
0
0
Hi Guys!,

Today I am sharing the code to get the call logs of a android device. For Access the call logs we need to first the aware about Content Provider.

Content providers manage access to a structured set of data. They encapsulate the data, and provide mechanisms for defining data security. Content providers are the standard interface that connects data in one process with code running in another process.
More About the Content Provider you can visit the android developer siteHere.

One of the most commonly used Content Providers isCallLog.Callswhich is used to provide access to call logs data. Call logs contain information about outgoing, incoming and missed calls.  

Letsstart the coding for call logs data accessing from the device.

main_activity.xml


list_row.xml


MainActivity.java

package com.sunil.callloginfo;

import java.util.ArrayList;
import java.util.Date;
import java.util.List;

import android.app.Activity;
import android.content.Context;
import android.database.Cursor;
import android.os.Bundle;
import android.provider.CallLog;
import android.widget.ListView;

public class MainActivity extends Activity {

private ListView listview=null;
private String callType=null;
private String phoneNumber=null;
private String callDate=null;
private String callDuration=null;
private Date callDateTime=null;

private List list=new ArrayList();
private Context context=null;
@Override
protected void onCreate(Bundle savedInstanceState) {
super.onCreate(savedInstanceState);
setContentView(R.layout.activity_main);
context=this;

listview=(ListView)findViewById(R.id.listView_calldata);

getCallDetails();
CustomAdapter adapter=new CustomAdapter(MainActivity.this, list);
listview.setAdapter(adapter);
}

public void getCallDetails()
{
@SuppressWarnings("deprecation")
Cursor managedCursor = managedQuery( CallLog.Calls.CONTENT_URI,null, null,null, null);

int number = managedCursor.getColumnIndex( CallLog.Calls.NUMBER );
int type = managedCursor.getColumnIndex( CallLog.Calls.TYPE );
int date = managedCursor.getColumnIndex( CallLog.Calls.DATE);
int duration = managedCursor.getColumnIndex( CallLog.Calls.DURATION);


while (managedCursor.moveToNext())
{

phoneNumber = managedCursor.getString(number);
callType = managedCursor.getString(type);
callDate = managedCursor.getString(date);

callDateTime = new Date(Long.valueOf(callDate));

callDuration = managedCursor.getString(duration);

String cType = null;

int cTypeCode = Integer.parseInt(callType);

switch(cTypeCode)
{
case CallLog.Calls.OUTGOING_TYPE:
cType = "OUTGOING";
break;

case CallLog.Calls.INCOMING_TYPE:
cType= "INCOMING";
break;

case CallLog.Calls.MISSED_TYPE:
cType = "MISSED";
break;
}

CallData calldata=new CallData(cType, phoneNumber, callDateTime, callDuration);
list.add(calldata);
}

managedCursor.close();
}
}

CallData.java

package com.sunil.callloginfo;

import java.io.Serializable;
import java.util.Date;

public class CallData implements Serializable{

private String calltype;
private String callnumber;
private Date calldatetime;
private String callduration;

public CallData()
{

}

public CallData(String calltype, String callnumber, Date calldatetime, String callduration)
{
this.calldatetime=calldatetime;
this.callduration=callduration;
this.callnumber=callnumber;
this.calltype=calltype;
}

public String getCalltype() {
return calltype;
}

public void setCalltype(String calltype) {
this.calltype = calltype;
}

public String getCallnumber() {
return callnumber;
}

public void setCallnumber(String callnumber) {
this.callnumber = callnumber;
}

public Date getCalldatetime() {
return calldatetime;
}

public void setCalldatetime(Date calldatetime) {
this.calldatetime = calldatetime;
}

public String getCallduration() {
return callduration;
}

public void setCallduration(String callduration) {
this.callduration = callduration;
}


}

CustomAdapter.java

package com.sunil.callloginfo;

import java.util.Date;
import java.util.List;

import android.app.Activity;
import android.view.LayoutInflater;
import android.view.View;
import android.view.ViewGroup;
import android.widget.ArrayAdapter;
import android.widget.TextView;

public class CustomAdapter extends ArrayAdapter{

private List listdata=null;
private LayoutInflater mInflater=null;
public CustomAdapter(Activity context, List calldata) {
super(context, 0);
this.listdata=calldata;
mInflater = context.getLayoutInflater();
}


@Override
public int getCount() {
return listdata.size();
}


public View getView(int position, View convertView, ViewGroup parent) {

final ViewHolder holder;

if (convertView == null || convertView.getTag() == null) {
holder = new ViewHolder();
convertView = mInflater.inflate(R.layout.list_row, null);

holder.callnumber = (TextView) convertView.findViewById(R.id.textView_callnumber);
holder.calltype = (TextView) convertView.findViewById(R.id.textView_calltype);
holder.calldate = (TextView) convertView.findViewById(R.id.textView_calldate);
holder.callduration = (TextView) convertView.findViewById(R.id.textView_callduration);
convertView.setTag(holder);
}
else {
holder = (ViewHolder) convertView.getTag();
}

CallData calldatalist=listdata.get(position);
String callnumber=calldatalist.getCallnumber();
String calltype=calldatalist.getCalltype();
Date calldate= calldatalist.getCalldatetime();
String callduration=calldatalist.getCallduration();

holder.callnumber.setText("Call Number: "+callnumber);
holder.calltype.setText("Call Type: "+calltype);
holder.calldate.setText("Call Date: "+String.valueOf(calldate));
holder.callduration.setText("Duration: "+callduration);

return convertView;
}

private static class ViewHolder {
TextView callnumber;
TextView calltype;
TextView calldate;
TextView callduration;
}

}

Manifest.xml


You can download the source code from Here Call Logs

Export And Import Data DB Table To CSV and Vice Versa

$
0
0
Hi Guys,

Today we are learning about the exporting and importing the table data from DB to CSV and CSV to DB table. In that tutorial first we are doing to insert the Person data into DB table by using the ORM open source. Then Exporting the same table data into the CSV file and stored in sd card.

For inserting the text data into sqlite table by using the ORM open source. More detail about the ORM open source in the last tutorial Here.

For exporting the db table we are using the opencsv.jar file. With the help of this jar file we are able to write and read the data of table and write into the CSV file. You can download the opencsv.jare file Here

In the next part we are sending to mail the csv file with attached with the help of android.content.Intent.ACTION_SEND.
So lets start the coding for the same.

activity_main.xml


Person.java

package com.sunil.export;

import java.io.Serializable;

import com.j256.ormlite.field.DatabaseField;

public class Person implements Serializable{

@DatabaseField(generatedId=true)
private int id;
@DatabaseField
private String firtname;
@DatabaseField
private String lastname;
@DatabaseField
private String address;
@DatabaseField
private String email;


public Person(){

}

public Person(String fname, String lname, String address, String email){
this.firtname=fname;
this.lastname=lname;
this.address=address;
this.email=email;
}

public int getId() {
return id;
}

public void setId(int id) {
this.id = id;
}

public String getFirtname() {
return firtname;
}

public void setFirtname(String firtname) {
this.firtname = firtname;
}

public String getLastname() {
return lastname;
}

public void setLastname(String lastname) {
this.lastname = lastname;
}

public String getAddress() {
return address;
}

public void setAddress(String address) {
this.address = address;
}

public String getEmail() {
return email;
}

public void setEmail(String email) {
this.email = email;
}

}

DatabaseHelper.java

package com.sunil.export;

import java.sql.SQLException;
import java.util.List;

import android.content.Context;
import android.database.sqlite.SQLiteDatabase;
import android.util.Log;

import com.j256.ormlite.android.apptools.OrmLiteSqliteOpenHelper;
import com.j256.ormlite.dao.RuntimeExceptionDao;
import com.j256.ormlite.stmt.UpdateBuilder;
import com.j256.ormlite.support.ConnectionSource;
import com.j256.ormlite.table.TableUtils;

public class DatabaseHelper extends OrmLiteSqliteOpenHelper {

private static final String TAG="DatabaseHelper";
private static final String DATABASE_NAME = "person.db";
private static final int DATABASE_VERSION = 1;
private RuntimeExceptionDao personRuntimeDao=null;

public DatabaseHelper(Context context) {
super(context, DATABASE_NAME, null, DATABASE_VERSION);
Log.v(TAG, "DatabaseHelper constructor call");
}


public RuntimeExceptionDao getPersonDataDao() {

Log.v(TAG, "getTimeDataDao call");

if (personRuntimeDao == null) {
personRuntimeDao = getRuntimeExceptionDao(Person.class);
}
return personRuntimeDao;
}
public int addPersonData(Person project)
{
Log.v(TAG, "addPersonData call");
RuntimeExceptionDao dao = getPersonDataDao();
int i = dao.create(project);
return i;
}

public List GetDataPerson()
{
Log.v(TAG, "GetDataPerson call");
RuntimeExceptionDao simpleDao = getPersonDataDao();
List list = simpleDao.queryForAll();
return list;
}

public void deleteAllPerson()
{
Log.v(TAG, "deleteAllPerson call");
RuntimeExceptionDao dao = getPersonDataDao();
List list = dao.queryForAll();
dao.delete(list);
}

public UpdateBuilder updatePersonData() throws SQLException
{
RuntimeExceptionDao simpleDao = getPersonDataDao();
UpdateBuilder updateBuilder = simpleDao.updateBuilder();
return updateBuilder;
}


@Override
public void close() {
super.close();
Log.v(TAG, "close call");
personRuntimeDao=null;
}

@Override
public void onCreate(SQLiteDatabase db, ConnectionSource connectionSource) {
try {
Log.v(TAG, "onCreate call");
TableUtils.createTable(connectionSource, Person.class);
} catch (SQLException e) {
Log.e(DatabaseHelper.class.getName(), "Can't create database", e);
throw new RuntimeException(e);
}
}

@Override
public void onUpgrade(SQLiteDatabase db, ConnectionSource connectionSource, int oldVersion, int newVersion) {
try {
Log.v(TAG, "onUpgrade call");
TableUtils.dropTable(connectionSource, Person.class, true);
onCreate(db, connectionSource);
} catch (SQLException e) {
Log.e(DatabaseHelper.class.getName(), "Can't drop databases", e);
throw new RuntimeException(e);
}
}
}

MainActivity.java

package com.sunil.export;

import java.io.File;
import java.io.FileNotFoundException;
import java.io.FileReader;
import java.io.FileWriter;
import java.io.IOException;
import java.sql.SQLException;
import java.util.List;

import android.net.Uri;
import android.os.AsyncTask;
import android.os.Bundle;
import android.os.Environment;
import android.R.integer;
import android.R.string;
import android.app.Activity;
import android.app.ProgressDialog;
import android.content.Intent;
import android.database.Cursor;
import android.database.sqlite.SQLiteDatabase;
import android.util.Log;
import android.view.Menu;
import android.view.View;
import android.view.View.OnClickListener;
import android.widget.Button;
import android.widget.EditText;
import android.widget.Toast;
import au.com.bytecode.opencsv.CSVReader;
import au.com.bytecode.opencsv.CSVWriter;

public class MainActivity extends Activity implements OnClickListener{

private static final String TAG="MainActivity";
private Button btnexport=null;
private Button btnimport=null;
private Button btninsertdata=null;
private Button btnsendmail=null;
private EditText txtfirtsname;
private EditText txtlastname;
private EditText txtaddress;
private EditText txtto;
private EditText txtsubj;
private EditText txttextmsg;
private EditText txtemail;
DatabaseHelper dbhelper=null;
File file=null;

@Override
protected void onCreate(Bundle savedInstanceState) {
super.onCreate(savedInstanceState);
setContentView(R.layout.activity_main);

Log.v(TAG, "onCreate called");
txtfirtsname = (EditText)findViewById(R.id.editText_fname);
txtlastname = (EditText)findViewById(R.id.editText_lname);
txtaddress = (EditText)findViewById(R.id.editText_address);
txtemail = (EditText)findViewById(R.id.editText_email);
txtto = (EditText) findViewById(R.id.editText_to);
txtsubj = (EditText) findViewById(R.id.editText_subj);
txttextmsg = (EditText) findViewById(R.id.editText_text);

btnexport=(Button)findViewById(R.id.button_export);
btnexport.setOnClickListener(this);
btninsertdata=(Button)findViewById(R.id.button_Insert);
btninsertdata.setOnClickListener(this);
btnsendmail=(Button) findViewById(R.id.button_sendmail);
btnsendmail.setOnClickListener(this);
btnimport=(Button)findViewById(R.id.button_import);
btnimport.setOnClickListener(this);

dbhelper=new DatabaseHelper(getApplicationContext());
}
@Override
public void onClick(View arg0) {

Log.v(TAG, "onClick called");
if(arg0==btnexport){

ExportDatabaseCSVTask task=new ExportDatabaseCSVTask();
task.execute();
}

else if(arg0==btnimport){


File exportDir = new File(Environment.getExternalStorageDirectory(), "");
if (!exportDir.exists()) {
exportDir.mkdirs();
}

file = new File(exportDir, "PersonCSV.csv");
try {
CSVReader reader = new CSVReader(new FileReader(file));
String [] nextLine;
try {
while ((nextLine = reader.readNext()) != null) {

// nextLine[] is an array of values from the line

String fname=nextLine[0];
String lname=nextLine[1];
String address=nextLine[2];
String email=nextLine[3];

if(fname.equalsIgnoreCase("First Name"))
{

}
else
{
int value=dbhelper.addPersonData(new Person(fname,lname,address,email));
if(value==1)
{
Toast.makeText(getApplicationContext(), "Data inerted into table", Toast.LENGTH_LONG).show();
}
}

}
} catch (IOException e) {
e.printStackTrace();
}

} catch (FileNotFoundException e) {
e.printStackTrace();
}
}
else if (arg0==btninsertdata) {

String firstname=txtfirtsname.getText().toString().trim();
String lastname=txtlastname.getText().toString().trim();
String addresss=txtaddress.getText().toString().trim();
String email=txtemail.getText().toString().trim();

if(firstname.length() < 1)
{
Toast.makeText(getApplicationContext(), "Please Enter First name", Toast.LENGTH_LONG).show();
}
else if (lastname.length() < 1) {
Toast.makeText(getApplicationContext(), "Please Enter Last name", Toast.LENGTH_LONG).show();
}
else if (addresss.length() < 1) {
Toast.makeText(getApplicationContext(), "Please Enter Address", Toast.LENGTH_LONG).show();
}
else if (email.length() < 1) {
Toast.makeText(getApplicationContext(), "Please Enter Email", Toast.LENGTH_LONG).show();
}
else {

Person person=new Person(firstname, lastname, addresss, email);
int status=dbhelper.addPersonData(person);
if(status==1)
{
Toast.makeText(getApplicationContext(), "Data inserted successfully.", Toast.LENGTH_LONG).show();
txtfirtsname.setText("");
txtlastname.setText("");
txtaddress.setText("");
txtemail.setText("");
}
}
}

else if (arg0==btnsendmail) {

String to=txtto.getText().toString().trim();
String subj=txtsubj.getText().toString().trim();
String msg=txttextmsg.getText().toString().trim();

if(to.length() < 1)
{
Toast.makeText(getApplicationContext(), "Please Enter Recipent Email", Toast.LENGTH_LONG).show();
}
else if (subj.length() < 1) {
Toast.makeText(getApplicationContext(), "Please Enter Subject", Toast.LENGTH_LONG).show();
}
else if (msg.length() < 1) {
Toast.makeText(getApplicationContext(), "Please Enter Message", Toast.LENGTH_LONG).show();
}
else {

Intent emailIntent = new Intent(android.content.Intent.ACTION_SEND);
emailIntent.setType("image/jpeg");
emailIntent.putExtra(android.content.Intent.EXTRA_EMAIL, new String[]{to});
emailIntent.putExtra(android.content.Intent.EXTRA_SUBJECT, subj);
emailIntent.putExtra(android.content.Intent.EXTRA_TEXT, msg);
emailIntent.putExtra(Intent.EXTRA_STREAM, Uri.parse(file.getAbsolutePath()));
startActivity(Intent.createChooser(emailIntent, "Send mail..."));
}
}
}

private class ExportDatabaseCSVTask extends AsyncTask{
private final ProgressDialog dialog = new ProgressDialog(MainActivity.this);

@Override
protected void onPreExecute() {

this.dialog.setMessage("Exporting database...");
this.dialog.show();

}
protected Boolean doInBackground(final String... args){

File dbFile=getDatabasePath("person.db");
Log.v(TAG, "Db path is: "+dbFile); //get the path of db

File exportDir = new File(Environment.getExternalStorageDirectory(), "");
if (!exportDir.exists()) {
exportDir.mkdirs();
}

file = new File(exportDir, "PersonCSV.csv");
try {

file.createNewFile();
CSVWriter csvWrite = new CSVWriter(new FileWriter(file));

//ormlite core method
List listdata=dbhelper.GetDataPerson();
Person person=null;

// this is the Column of the table and same for Header of CSV file
String arrStr1[] ={"First Name", "Last Name", "Address", "Email"};
csvWrite.writeNext(arrStr1);

if(listdata.size() > 1)
{
for(int index=0; index < listdata.size(); index++)
{
person=listdata.get(index);
String arrStr[] ={person.getFirtname(), person.getLastname(), person.getAddress(), person.getEmail()};
csvWrite.writeNext(arrStr);
}
}

csvWrite.close();
return true;
}
catch (IOException e){
Log.e("MainActivity", e.getMessage(), e);
return false;
}
}

@Override
protected void onPostExecute(final Boolean success) {

if (this.dialog.isShowing()){
this.dialog.dismiss();
}
if (success){
Toast.makeText(MainActivity.this, "Export successful!", Toast.LENGTH_SHORT).show();
}
else {
Toast.makeText(MainActivity.this, "Export failed!", Toast.LENGTH_SHORT).show();
}
}
}
}

Manifest.xml


You can download the source code from here ExportSqliteToCSV

Slide Menu Navigation Drawer in Android Sherlock

$
0
0
Hi Guys,

In this tutorial I describe about the slide menu navigation drawer in android. For this I have to use the Sherlock library as for supporting the Sherlock Fragment which is supported the lower version of API also.

ActionBarSherlock is an extension of the support library designed to facilitate the use of the action bar design pattern across all versions of Android with a single API.

The library will automatically use the native action bar when appropriate or will automatically wrap a custom implementation around your layouts. This allows you to easily develop an application with an action bar for every version of Android from 2.x and up.You can download the Sherlock library from Here.

Now you just import this library into your project area of eclipse. And Add this action sherlock library with your uses of project. How to Add the library with your project?
Right Click of your proejct -> Properties -> Android -> Add (click here and select your library).


In this library android support v4 library already there then there is no need to put android-support v4 library in your project. If this is availability in your project libs then remove from there.

Navigation Drawer:  The navigation drawer is a panel that transitions in from the left edge of the screen and displays the app’s main navigation options.
The user can bring the navigation drawer onto the screen by swiping from the left edge of the screen or by touching the application icon on the action bar. You can download the sample for same by use of Action Bar and more detail about Navigaion DrawertHere.

So in this tutorial I have implemented this navigation drawer features by using of sherlock library.
Here is the video you can watch what have implemented with this.


Now Lets Start the Coding to implements the Slid Menu Navigation Drawer in android.
 

activity_main.xml


MainActivity.java

package com.sunil.navigation;

import android.content.res.Configuration;
import android.graphics.Color;
import android.os.Bundle;
import android.support.v4.app.ActionBarDrawerToggle;
import android.support.v4.app.FragmentTransaction;
import android.support.v4.view.GravityCompat;
import android.support.v4.widget.DrawerLayout;
import android.view.View;
import android.widget.AdapterView;
import android.widget.AdapterView.OnItemClickListener;
import android.widget.ListView;

import com.actionbarsherlock.app.SherlockFragmentActivity;
import com.actionbarsherlock.view.MenuItem;

public class MainActivity extends SherlockFragmentActivity implements OnItemClickListener{

private DrawerLayout drawlayout=null;
private ListView listview=null;
private ActionBarDrawerToggle actbardrawertoggle=null;

private String[] myfriendname=null;
private String[] myfriendnickname=null;
private int[] photo=null;
//Fragment fragment1 = new Fragment1();
@Override
protected void onCreate(Bundle savedInstanceState) {
super.onCreate(savedInstanceState);
setContentView(R.layout.activity_main);

myfriendname = new String[] { "Sunil Gupta", "Abhishek Tripathi","Sandeep Pal", "Amit Verma" };
myfriendnickname = new String[] { "sunil android", "Abhi cool","Sandy duffer", "Budhiya jokar"};
photo = new int[] { R.drawable.sunil, R.drawable.abhi, R.drawable.sandy, R.drawable.amit};

drawlayout = (DrawerLayout)findViewById(R.id.drawer_layout);
listview = (ListView) findViewById(R.id.listview_drawer);

getSupportActionBar().setHomeButtonEnabled(true);
getSupportActionBar().setDisplayHomeAsUpEnabled(true);
getSupportActionBar().setDisplayShowHomeEnabled(true);
getSupportActionBar().setDisplayShowTitleEnabled(true);

drawlayout.setDrawerShadow(R.drawable.drawer_shadow, GravityCompat.START);
drawlayout.setBackgroundColor(Color.WHITE);

MenuListAdapter menuadapter=new MenuListAdapter(getApplicationContext(), myfriendname, myfriendnickname, photo);
listview.setAdapter(menuadapter);

actbardrawertoggle= new ActionBarDrawerToggle(this, drawlayout, R.drawable.ic_drawer, R.string.drawer_open, R.string.drawer_close)
{
public void onDrawerClosed(View view) {
super.onDrawerClosed(view);
}

public void onDrawerOpened(View drawerView) {
super.onDrawerOpened(drawerView);

}

};
drawlayout.setDrawerListener(actbardrawertoggle);

listview.setOnItemClickListener(this);

if (savedInstanceState == null) {
selectItem(0);
}
}

@Override
protected void onPostCreate(Bundle savedInstanceState) {
super.onPostCreate(savedInstanceState);
actbardrawertoggle.syncState();
}

@Override
public void onConfigurationChanged(Configuration newConfig) {
super.onConfigurationChanged(newConfig);
actbardrawertoggle.onConfigurationChanged(newConfig);
}

@Override
public void onItemClick(AdapterView arg0, View arg1, int position, long arg3) {
selectItem(position);

}


private void selectItem(int position) {

FragmentTransaction ft = getSupportFragmentManager().beginTransaction();

// Locate Position
switch (position) {
case 0:
Fragment1 fragment1=new Fragment1();
ft.replace(R.id.content_frame, fragment1);
Bundle b = new Bundle();
b.putString("name",myfriendname[position]);
b.putInt("photo",photo[position]);
fragment1.setArguments(b);
break;
case 1:
Fragment2 fragment2=new Fragment2();
ft.replace(R.id.content_frame, fragment2);
Bundle b1 = new Bundle();
b1.putString("name",myfriendname[position]);
b1.putInt("photo",photo[position]);
fragment2.setArguments(b1);
break;
case 2:
Fragment3 fragment3=new Fragment3();
ft.replace(R.id.content_frame, fragment3);
Bundle b2 = new Bundle();
b2.putString("name",myfriendname[position]);
b2.putInt("photo",photo[position]);
fragment3.setArguments(b2);
break;
case 3:
Fragment4 fragment4=new Fragment4();
ft.replace(R.id.content_frame, fragment4);
Bundle b3 = new Bundle();
b3.putString("name",myfriendname[position]);
b3.putInt("photo",photo[position]);
fragment4.setArguments(b3);
break;
}
ft.commit();
listview.setItemChecked(position, true);
setTitle(myfriendname[position]);
drawlayout.closeDrawer(listview);
}

@Override
public boolean onOptionsItemSelected(MenuItem item) {

if(item.getItemId()==android.R.id.home)
{
if(drawlayout.isDrawerOpen(listview))
{
drawlayout.closeDrawer(listview);
}
else {
drawlayout.openDrawer(listview);
}
}
return super.onOptionsItemSelected(item);
}

}

drawer_list_item.xml


MenuListAdapter.java

package com.sunil.navigation;

import android.content.Context;
import android.view.LayoutInflater;
import android.view.View;
import android.view.ViewGroup;
import android.widget.BaseAdapter;
import android.widget.ImageView;
import android.widget.TextView;

public class MenuListAdapter extends BaseAdapter{

private Context context;
private String[] mtitle;
private String[] msubTitle;
private int[] micon;
private LayoutInflater inflater;

public MenuListAdapter(Context context, String title[], String subtilte[], int icon[])
{
this.context=context;
this.mtitle=title;
this.msubTitle=subtilte;
this.micon=icon;

}
@Override
public int getCount() {
return mtitle.length;
}

@Override
public Object getItem(int arg0) {
return arg0;
}

@Override
public long getItemId(int arg0) {
return arg0;
}

@Override
public View getView(int position, View arg1, ViewGroup parent) {

TextView title;
TextView subtitle;
ImageView icon;

inflater = (LayoutInflater) context.getSystemService(Context.LAYOUT_INFLATER_SERVICE);
View itemView = inflater.inflate(R.layout.drawer_list_item, parent, false);

title = (TextView) itemView.findViewById(R.id.title);
subtitle = (TextView) itemView.findViewById(R.id.subtitle);
icon = (ImageView) itemView.findViewById(R.id.icon);

title.setText(mtitle[position]);
subtitle.setText(msubTitle[position]);
icon.setImageResource(micon[position]);

return itemView;

}

}

fragment1.xml


Fragment1.java

package com.sunil.navigation;

import android.graphics.Color;
import android.os.Bundle;
import android.view.LayoutInflater;
import android.view.View;
import android.view.ViewGroup;
import android.widget.ImageView;
import android.widget.TextView;

import com.actionbarsherlock.app.SherlockFragment;

public class Fragment1 extends SherlockFragment{

private ImageView imageview=null;
private TextView textname=null;
private TextView textdescription=null;
@Override
public View onCreateView(LayoutInflater inflater, ViewGroup container,Bundle savedInstanceState) {
View view=inflater.inflate(R.layout.fragment1, container, false);

imageview=(ImageView)view.findViewById(R.id.imageView_pic);
textname=(TextView)view.findViewById(R.id.textView_name);
textdescription=(TextView)view.findViewById(R.id.textView_descroption);

textname.setTextColor(Color.BLACK);
textdescription.setTextColor(Color.BLACK);

Bundle bundle=this.getArguments();
if(bundle != null)
{
String name=bundle.getString("name");
int pic=bundle.getInt("photo");
textname.setText(name);
imageview.setImageResource(pic);
}

textdescription.setText("I'm currently working as Android developer, interested in a wide-range of technology topics, including programming languages, opensource and any other cool technology that catches my eye. I love developing apps for Android, designing and coding.");
return view;
}

@Override
public void onCreate(Bundle savedInstanceState) {
super.onCreate(savedInstanceState);


}
}

Manifest.xml


Same way you can add the Fragment2, Fragment3 and Fragment4. I have not added this classes to make clean this article.


You can download the source code ABSMenuNavigationDrawer 

Lazy Loading Image Download from Internet in android

$
0
0
Hi Guys,

Today we have share the knowledge about the lazy loading image download from the internet in android.
The images will downloaded very fast with the help of the multiple thread.

Images that are not visible on the initial page load are not loaded or downloaded until they come into the main viewing area. Once an image comes into view it is then downloaded and faded into visibility. Scroll down this page to see the action for same.

For this i am using the open source library universal image loader made by nostra. Here you can download the universal image loader library Here.

I added the video to show the lazy loading the image and show in the list view.


Lets start the coding about the lazy loading.


MainActivity.java

package com.sunil.lazyloading;


import android.os.Bundle;
import android.app.Activity;
import android.content.Intent;
import android.view.Menu;
import android.view.View;
import android.view.View.OnClickListener;
import android.widget.Button;

public class MainActivity extends Activity implements OnClickListener{

private Button btnlist=null;

@Override
protected void onCreate(Bundle savedInstanceState) {
super.onCreate(savedInstanceState);
setContentView(R.layout.activity_main);

btnlist= (Button)findViewById(R.id.button_listview);
btnlist.setOnClickListener(this);
}
@Override
public void onClick(View arg0) {

Intent intent = new Intent(this, ImageListActivity.class);
intent.putExtra("stringarrayimage", Constants.IMAGES);
startActivity(intent);

}

}

CustomAdapter.java

package com.sunil.adapter;

import java.util.Collections;
import java.util.LinkedList;
import java.util.List;

import com.nostra13.universalimageloader.core.DisplayImageOptions;
import com.nostra13.universalimageloader.core.ImageLoader;
import com.nostra13.universalimageloader.core.assist.ImageLoadingListener;
import com.nostra13.universalimageloader.core.assist.SimpleImageLoadingListener;
import com.nostra13.universalimageloader.core.display.FadeInBitmapDisplayer;
import com.nostra13.universalimageloader.core.display.RoundedBitmapDisplayer;
import com.sunil.lazyloading.R;

import android.app.Activity;
import android.content.Context;
import android.graphics.Bitmap;
import android.view.View;
import android.view.ViewGroup;
import android.widget.BaseAdapter;
import android.widget.ImageView;
import android.widget.TextView;

public class CustomAdapter extends BaseAdapter{

private String imageurl[]=null;
private Context context=null;
DisplayImageOptions doption=null;
private ImageLoadingListener animateFirstListener =null;


public CustomAdapter(Activity activity, String[] imageurl)
{
this.context=activity;
this.imageurl=imageurl;
doption=new DisplayImageOptions.Builder().showImageForEmptyUri(R.drawable.ic_empty).showImageOnFail(R.drawable.ic_error).showStubImage(R.drawable.ic_stub).cacheInMemory(true).cacheOnDisc(true).displayer(new RoundedBitmapDisplayer(20)).build();
animateFirstListener = new AnimateFirstDisplayListener();
}

@Override
public int getCount() {
return imageurl.length;
}

@Override
public Object getItem(int arg0) {
return arg0;
}

@Override
public long getItemId(int arg0) {
return arg0;
}

@Override
public View getView(int position, View convertView, ViewGroup parent) {

View view = convertView;
final ViewHolder holder;

if (convertView == null) {
view = ((Activity) context).getLayoutInflater().inflate(R.layout.item_list_row, parent, false);
holder = new ViewHolder();
holder.text = (TextView) view.findViewById(R.id.text);
holder.image = (ImageView) view.findViewById(R.id.image);
view.setTag(holder);
} else {
holder = (ViewHolder) view.getTag();
}

holder.text.setText("Item " + (position + 1));
ImageLoader imageLoader = ImageLoader.getInstance();
imageLoader.displayImage(imageurl[position], holder.image, doption, animateFirstListener);

return view;
}

private static class AnimateFirstDisplayListener extends SimpleImageLoadingListener {

static final List displayedImages = Collections.synchronizedList(new LinkedList());

@Override
public void onLoadingComplete(String imageUri, View view, Bitmap loadedImage) {
if (loadedImage != null) {
ImageView imageView = (ImageView) view;
boolean firstDisplay = !displayedImages.contains(imageUri);
if (firstDisplay) {
FadeInBitmapDisplayer.animate(imageView, 500);
displayedImages.add(imageUri);
}
}
}
}

private class ViewHolder {
public TextView text;
public ImageView image;
}
}

ImageListActivity.java

package com.sunil.lazyloading;


import java.util.Collections;
import java.util.LinkedList;
import java.util.List;

import android.app.Activity;
import android.content.Intent;
import android.graphics.Bitmap;
import android.os.Bundle;
import android.view.Menu;
import android.view.MenuItem;
import android.view.View;
import android.widget.AdapterView;
import android.widget.AdapterView.OnItemClickListener;
import android.widget.ImageView;
import android.widget.ListView;

import com.nostra13.universalimageloader.core.ImageLoader;
import com.nostra13.universalimageloader.core.assist.SimpleImageLoadingListener;
import com.nostra13.universalimageloader.core.display.FadeInBitmapDisplayer;
import com.sunil.adapter.CustomAdapter;

public class ImageListActivity extends Activity implements OnItemClickListener{

private ListView listview=null;
private String[] imageUrls;
protected ImageLoader imageLoader=null;
@Override
protected void onCreate(Bundle savedInstanceState) {
super.onCreate(savedInstanceState);
setContentView(R.layout.imagelist);

listview=(ListView)findViewById(R.id.listView_image);
imageLoader = ImageLoader.getInstance();
Bundle bundle = getIntent().getExtras();
imageUrls = bundle.getStringArray("stringarrayimage");
CustomAdapter adapter=new CustomAdapter(ImageListActivity.this, imageUrls);
listview.setAdapter(adapter);

listview.setOnItemClickListener(this);

}
@Override
public void onItemClick(AdapterView arg0, View arg1, int position, long arg3) {
Intent intent = new Intent(this, ImagePagerActivity.class);
intent.putExtra("imageurlpostion", imageUrls);
intent.putExtra("imagepostion", position);
startActivity(intent);

}

@Override
public void onBackPressed() {
AnimateFirstDisplayListener.displayedImages.clear();
super.onBackPressed();
}


private static class AnimateFirstDisplayListener extends SimpleImageLoadingListener {

static final List displayedImages = Collections.synchronizedList(new LinkedList());

@Override
public void onLoadingComplete(String imageUri, View view, Bitmap loadedImage) {
if (loadedImage != null) {
ImageView imageView = (ImageView) view;
boolean firstDisplay = !displayedImages.contains(imageUri);
if (firstDisplay) {
FadeInBitmapDisplayer.animate(imageView, 500);
displayedImages.add(imageUri);
}
}
}
}

@Override
public boolean onCreateOptionsMenu(Menu menu) {
getMenuInflater().inflate(R.menu.main, menu);
return true;
}

@Override
public boolean onOptionsItemSelected(MenuItem item) {
switch (item.getItemId()) {
case R.id.item_clear_memory_cache:
imageLoader.clearMemoryCache();
return true;
case R.id.item_clear_disc_cache:
imageLoader.clearDiscCache();
return true;
default:
return false;
}
}
}

activity_main.xml


imagelist.xml


item_list_row.xml


You can download the source code Lazy Loading Image Cheers guys!

File Upload on PHP Server in Android

$
0
0
Hi guys,

This tutorial might be helpful to all developer to upload the image or any file on the server. Most of the critical code that most of the beginner facing stuff to upload image on server.

For this using multipart boundary. So here question is arises what is multipart boundary and why use it?
The Content-Type field for multipart entities requires one parameter, "boundary", which is used to specify the encapsulation boundary. The encapsulation boundary is defined as a line consisting entirely of two hyphen characters ("-", decimal code 45) followed by the boundary parameter value from the Content-Type header field.
Thus, a typical multipart Content-Type header field might look like this:

 Content-Type: multipart/mixed; boundary=gc0p4Jq0M2Yt08jU534c0p
 
This indicates that the entity consists of several parts, each itself with a structure that is syntactically identical to an RFC 822 message, except that the header area might be completely empty, and that the parts are each preceded by the line --gc0p4Jq0M2Yt08jU534c0p.

Things to Note:
  1. The encapsulation boundary must occur at the beginning of a line, i.e., following a CRLF (Carriage Return-Line Feed)
  2. The boundary must be followed immediately either by another CRLF and the header fields for the next part, or by two CRLFs, in which case there are no header fields for the next part (and it is therefore assumed to be of Content-Type text/plain).
  3. Encapsulation boundaries must not appear within the encapsulations, and must be no longer than 70 characters, not counting the two leading hyphens.
The encapsulation boundary following the last body part is a distinguished delimiter that indicates that no further body parts will follow. Such a delimiter is identical to the previous delimiters, with the addition of two more hyphens at the end of the line. More Details Here.

Here first I am using the code for getting the image from the gallery and set on image-view. And the set image path of the gallery  on textview and send to this path for upload the image.

Lets start the code:


main_activity.xml


MainActivity.java

package com.sunil.upload;

import java.io.DataOutputStream;
import java.io.File;
import java.io.FileInputStream;
import java.net.HttpURLConnection;
import java.net.MalformedURLException;
import java.net.URL;

import android.app.Activity;
import android.app.ProgressDialog;
import android.content.Intent;
import android.database.Cursor;
import android.graphics.Bitmap;
import android.graphics.BitmapFactory;
import android.net.Uri;
import android.os.Bundle;
import android.provider.MediaStore;
import android.util.Log;
import android.view.View;
import android.view.View.OnClickListener;
import android.widget.Button;
import android.widget.ImageView;
import android.widget.TextView;
import android.widget.Toast;

public class MainActivity extends Activity implements OnClickListener{

private TextView messageText;
private Button uploadButton, btnselectpic;
private ImageView imageview;
private int serverResponseCode = 0;
private ProgressDialog dialog = null;

private String upLoadServerUri = null;
private String imagepath=null;
@Override
public void onCreate(Bundle savedInstanceState) {

super.onCreate(savedInstanceState);
setContentView(R.layout.activity_main);

uploadButton = (Button)findViewById(R.id.uploadButton);
messageText = (TextView)findViewById(R.id.messageText);
btnselectpic = (Button)findViewById(R.id.button_selectpic);
imageview = (ImageView)findViewById(R.id.imageView_pic);

btnselectpic.setOnClickListener(this);
uploadButton.setOnClickListener(this);
upLoadServerUri = "http://192.168.0.15/UploadToServer.php";
}


@Override
public void onClick(View arg0) {
if(arg0==btnselectpic)
{
Intent intent = new Intent();
intent.setType("image/*");
intent.setAction(Intent.ACTION_GET_CONTENT);
startActivityForResult(Intent.createChooser(intent, "Complete action using"), 1);
}
else if (arg0==uploadButton) {

dialog = ProgressDialog.show(MainActivity.this, "", "Uploading file...", true);
messageText.setText("uploading started.....");
new Thread(new Runnable() {
public void run() {

uploadFile(imagepath);

}
}).start();
}

}

@Override
protected void onActivityResult(int requestCode, int resultCode, Intent data) {

if (requestCode == 1 && resultCode == RESULT_OK) {
//Bitmap photo = (Bitmap) data.getData().getPath();

Uri selectedImageUri = data.getData();
imagepath = getPath(selectedImageUri);
Bitmap bitmap=BitmapFactory.decodeFile(imagepath);
imageview.setImageBitmap(bitmap);
messageText.setText("Uploading file path:" +imagepath);

}
}
public String getPath(Uri uri) {
String[] projection = { MediaStore.Images.Media.DATA };
Cursor cursor = managedQuery(uri, projection, null, null, null);
int column_index = cursor.getColumnIndexOrThrow(MediaStore.Images.Media.DATA);
cursor.moveToFirst();
return cursor.getString(column_index);
}

public int uploadFile(String sourceFileUri) {


String fileName = sourceFileUri;

HttpURLConnection conn = null;
DataOutputStream dos = null;
String lineEnd = "\r\n";
String twoHyphens = "--";
String boundary = "*****";
int bytesRead, bytesAvailable, bufferSize;
byte[] buffer;
int maxBufferSize = 1 * 1024 * 1024;
File sourceFile = new File(sourceFileUri);

if (!sourceFile.isFile()) {

dialog.dismiss();

Log.e("uploadFile", "Source File not exist :"+imagepath);

runOnUiThread(new Runnable() {
public void run() {
messageText.setText("Source File not exist :"+ imagepath);
}
});

return 0;

}
else
{
try {

// open a URL connection to the Servlet
FileInputStream fileInputStream = new FileInputStream(sourceFile);
URL url = new URL(upLoadServerUri);

// Open a HTTP connection to the URL
conn = (HttpURLConnection) url.openConnection();
conn.setDoInput(true); // Allow Inputs
conn.setDoOutput(true); // Allow Outputs
conn.setUseCaches(false); // Don't use a Cached Copy
conn.setRequestMethod("POST");
conn.setRequestProperty("Connection", "Keep-Alive");
conn.setRequestProperty("ENCTYPE", "multipart/form-data");
conn.setRequestProperty("Content-Type", "multipart/form-data;boundary=" + boundary);
conn.setRequestProperty("uploaded_file", fileName);

dos = new DataOutputStream(conn.getOutputStream());

dos.writeBytes(twoHyphens + boundary + lineEnd);
dos.writeBytes("Content-Disposition: form-data; name=\"uploaded_file\";filename=\""
+ fileName + "\"" + lineEnd);

dos.writeBytes(lineEnd);

// create a buffer of maximum size
bytesAvailable = fileInputStream.available();

bufferSize = Math.min(bytesAvailable, maxBufferSize);
buffer = new byte[bufferSize];

// read file and write it into form...
bytesRead = fileInputStream.read(buffer, 0, bufferSize);

while (bytesRead > 0) {

dos.write(buffer, 0, bufferSize);
bytesAvailable = fileInputStream.available();
bufferSize = Math.min(bytesAvailable, maxBufferSize);
bytesRead = fileInputStream.read(buffer, 0, bufferSize);

}

// send multipart form data necesssary after file data...
dos.writeBytes(lineEnd);
dos.writeBytes(twoHyphens + boundary + twoHyphens + lineEnd);

// Responses from the server (code and message)
serverResponseCode = conn.getResponseCode();
String serverResponseMessage = conn.getResponseMessage();

Log.i("uploadFile", "HTTP Response is : "
+ serverResponseMessage + ": " + serverResponseCode);

if(serverResponseCode == 200){

runOnUiThread(new Runnable() {
public void run() {
String msg = "File Upload Completed.\n\n See uploaded file here : \n\n"
+" F:/wamp/wamp/www/uploads";
messageText.setText(msg);
Toast.makeText(MainActivity.this, "File Upload Complete.", Toast.LENGTH_SHORT).show();
}
});
}

//close the streams //
fileInputStream.close();
dos.flush();
dos.close();

} catch (MalformedURLException ex) {

dialog.dismiss();
ex.printStackTrace();

runOnUiThread(new Runnable() {
public void run() {
messageText.setText("MalformedURLException Exception : check script url.");
Toast.makeText(MainActivity.this, "MalformedURLException", Toast.LENGTH_SHORT).show();
}
});

Log.e("Upload file to server", "error: " + ex.getMessage(), ex);
} catch (Exception e) {

dialog.dismiss();
e.printStackTrace();

runOnUiThread(new Runnable() {
public void run() {
messageText.setText("Got Exception : see logcat ");
Toast.makeText(MainActivity.this, "Got Exception : see logcat ", Toast.LENGTH_SHORT).show();
}
});
Log.e("Upload file to server Exception", "Exception : " + e.getMessage(), e);
}
dialog.dismiss();
return serverResponseCode;

} // End else block
}


}

UploadToServer.php


Please put the UploadToServer.php file inside the www folder of the WAMP Server.
And create the folder uploads inside the www folder of the wamp. See the screen shot to upload the pictures.

You can download the source code file with php file UploadFileOnServer.

Cheers  Guys!

Custom Time Picker with Time Interval of 15 minute.

$
0
0
Android it’s very easy to set the time using the android.widget.TimePicker component. In this tutorial we are going to see how the user can select the hour, and the minute using the android.app.TimePickerDialog which is an easy to use the dialog box.

In this tutorial I am creating the custom Time Picker with minute interval 00-15-30-45.

So lets start the coding to create the custom time picker in android.


activity_main.xml


MainActivity.java

package com.example.customtimepicker;

import java.util.Calendar;

import android.app.Activity;
import android.app.TimePickerDialog;
import android.content.Context;
import android.os.Bundle;
import android.view.View;
import android.view.View.OnClickListener;
import android.widget.Button;
import android.widget.EditText;
import android.widget.TimePicker;

public class MainActivity extends Activity implements OnClickListener{

private EditText txt_time=null;
private Button btn_time=null;
@Override
protected void onCreate(Bundle savedInstanceState) {
super.onCreate(savedInstanceState);
setContentView(R.layout.activity_main);

txt_time=(EditText)findViewById(R.id.editText_time);
btn_time=(Button)findViewById(R.id.button_time);
btn_time.setOnClickListener(this);
}
@Override
public void onClick(View arg0) {
CustomTimePickerDialog timePickerDialog = new CustomTimePickerDialog(MainActivity.this, timeSetListener,
Calendar.getInstance().get(Calendar.HOUR),
CustomTimePickerDialog.getRoundedMinute(Calendar.getInstance().get(Calendar.MINUTE) + CustomTimePickerDialog.TIME_PICKER_INTERVAL), true);
timePickerDialog.setTitle("Set hours and minutes");
timePickerDialog.show();
}

public static class CustomTimePickerDialog extends TimePickerDialog{

public static final int TIME_PICKER_INTERVAL=15;
private boolean mIgnoreEvent=false;

public CustomTimePickerDialog(Context context, OnTimeSetListener callBack, int hourOfDay, int minute, boolean is24HourView) {
super(context, callBack, hourOfDay, minute, is24HourView);
}

@Override
public void onTimeChanged(TimePicker timePicker, int hourOfDay, int minute) {
super.onTimeChanged(timePicker, hourOfDay, minute);
if (!mIgnoreEvent){
minute = getRoundedMinute(minute);
mIgnoreEvent=true;
timePicker.setCurrentMinute(minute);
mIgnoreEvent=false;
}
}

public static int getRoundedMinute(int minute){
if(minute % TIME_PICKER_INTERVAL != 0){
int minuteFloor = minute - (minute % TIME_PICKER_INTERVAL);
minute = minuteFloor + (minute == minuteFloor + 1 ? TIME_PICKER_INTERVAL : 0);
if (minute == 60) minute=0;
}

return minute;
}
}

private CustomTimePickerDialog.OnTimeSetListener timeSetListener = new CustomTimePickerDialog.OnTimeSetListener() {
@Override
public void onTimeSet(TimePicker view, int hourOfDay, int minute) {
txt_time.setText(String.format("%02d", hourOfDay) + ":" +String.format("%02d", minute));
}
};
}


You can download the source code CustomTimePicker.

Cheers Guys!
Viewing all 106 articles
Browse latest View live